Dye a coffee filter with red food colouring (this is the same technique used here)
If you will be using tissue paper, skip to step 3 by simply cutting a square of 2 1/2″and fold it in half to form a rectangle (sorry I forgot to number the pictures)
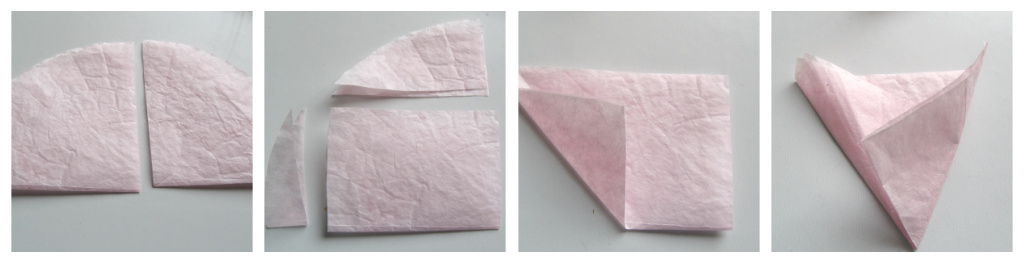
1. Fold coffee filter in half to form a semi circle and cut vertically in half
2. Trim edges to form a rectangle.
3. Fold over from left to right towards the centre, and
4. Again from right to left towards centre to form a cone.
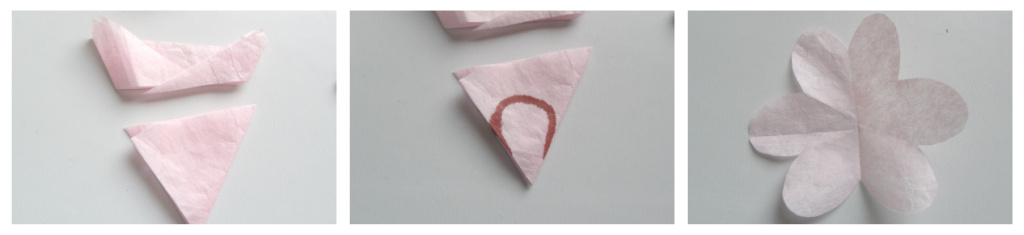
5. Trim excess paper from top
6. Draw an upside down tear drop and cut along the line
7. Open it up and you have a six petal flower

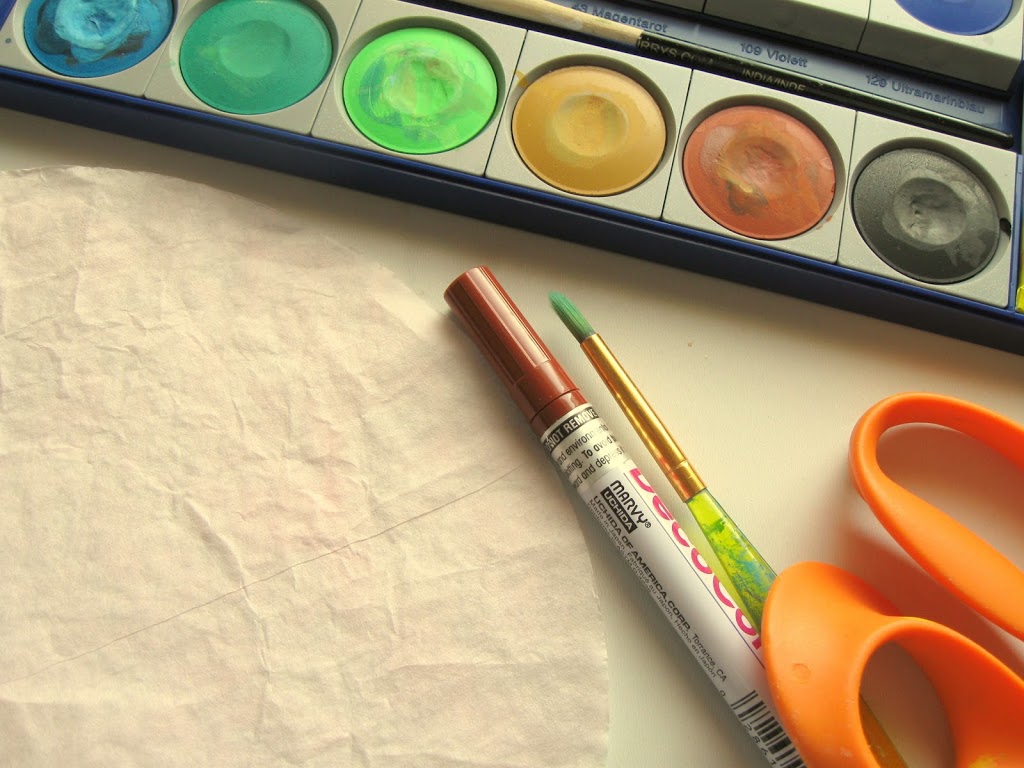
8. Using very diluted paint or food colouring (I used water colour), paint a circle in the middle
9. Allow paint to dry and add some small brown dots
10. Pinch flower from the bottom, twist a little to form a cherry blossom
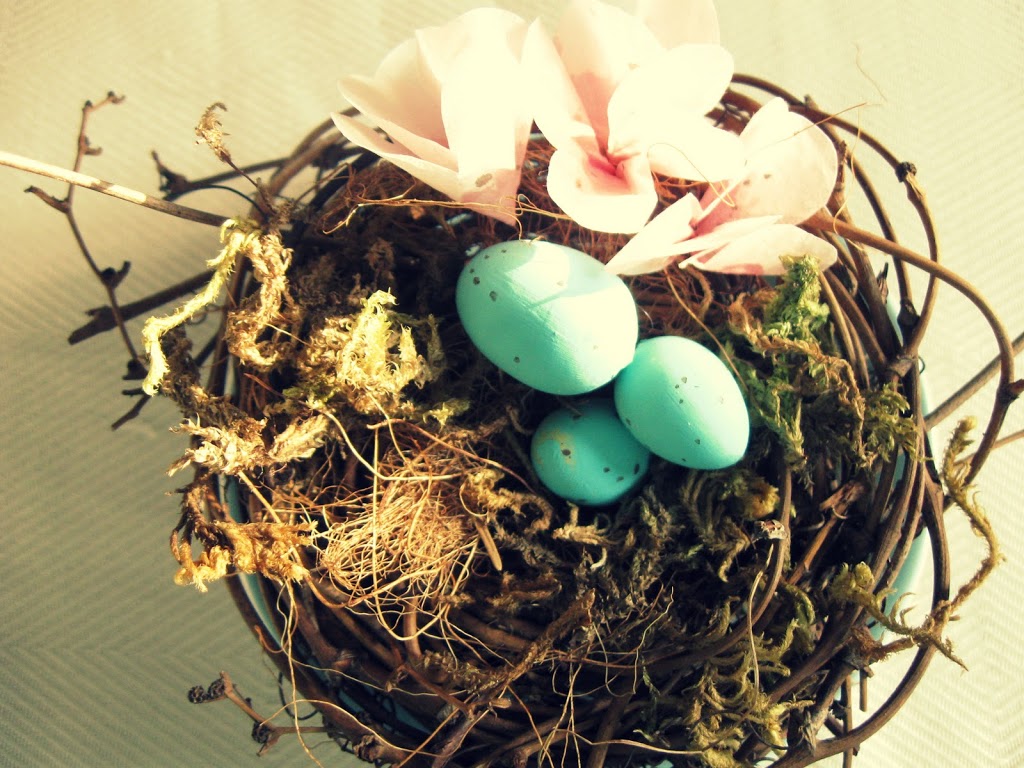
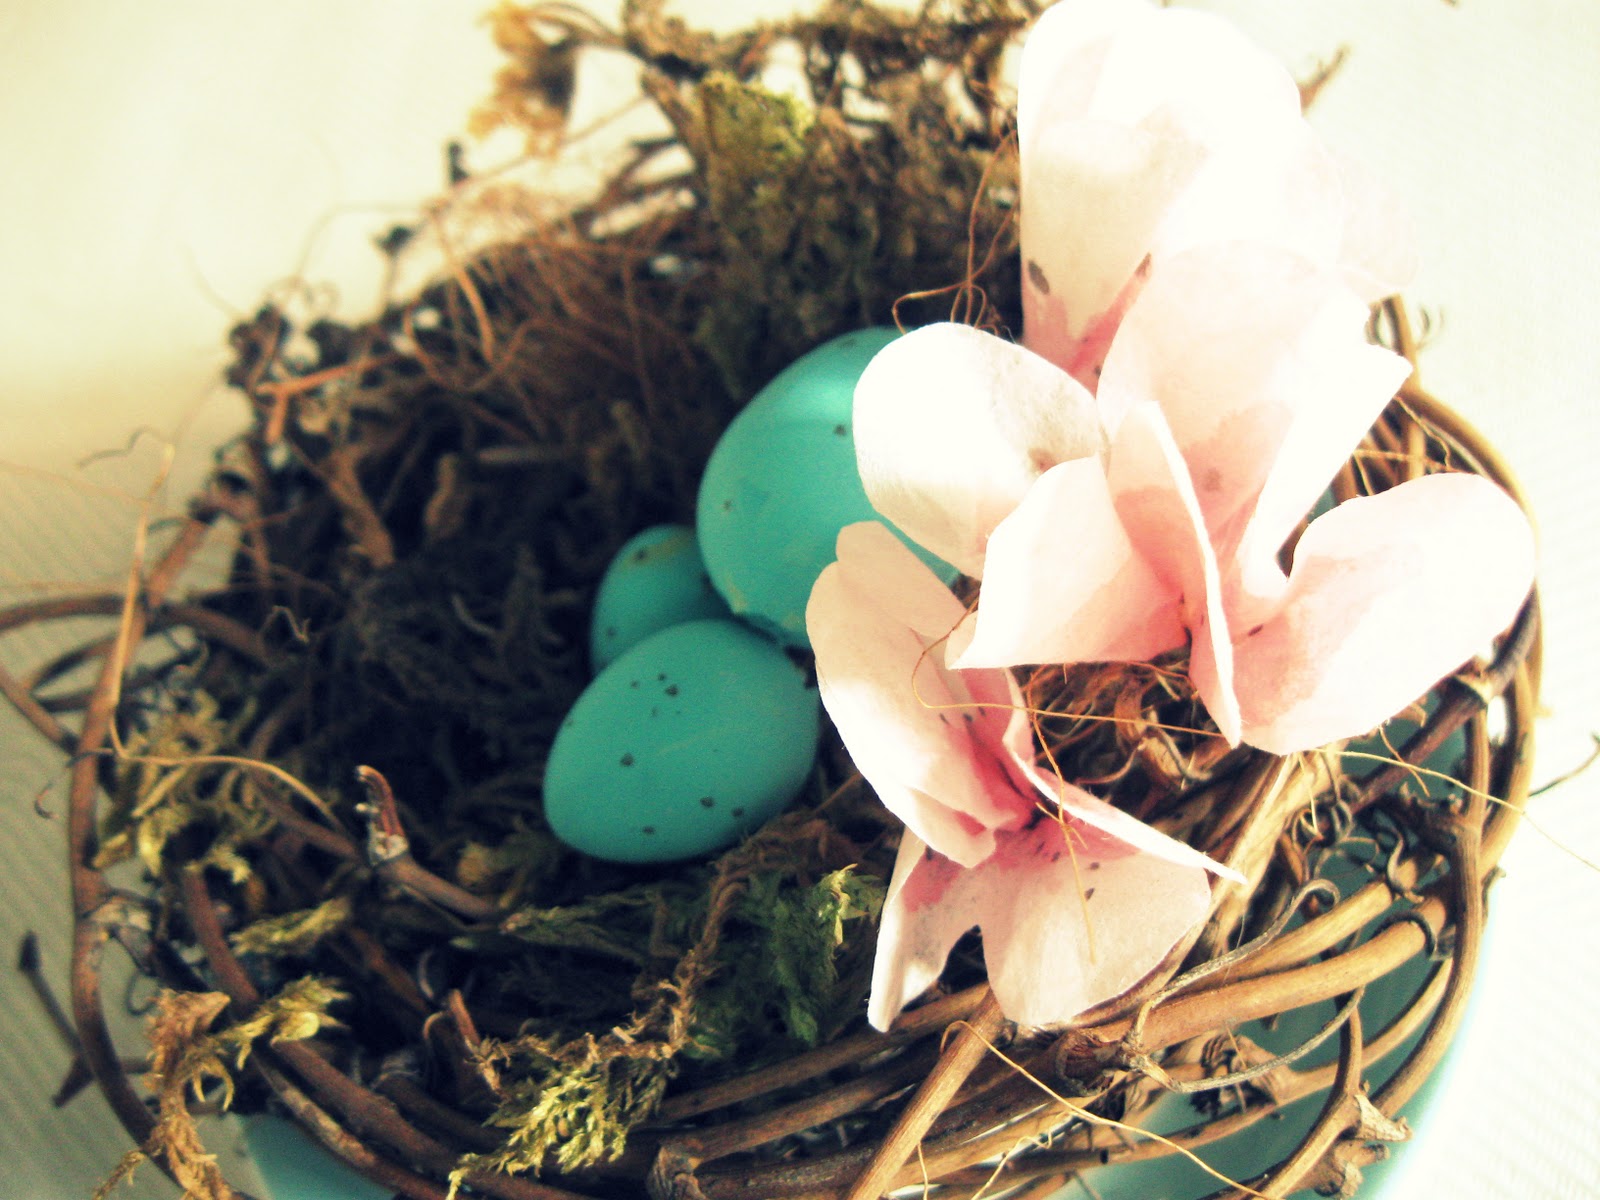
The darker shade of pink in the centre and the small dots enhance the look of the cherry blossom, making it look more realistic.
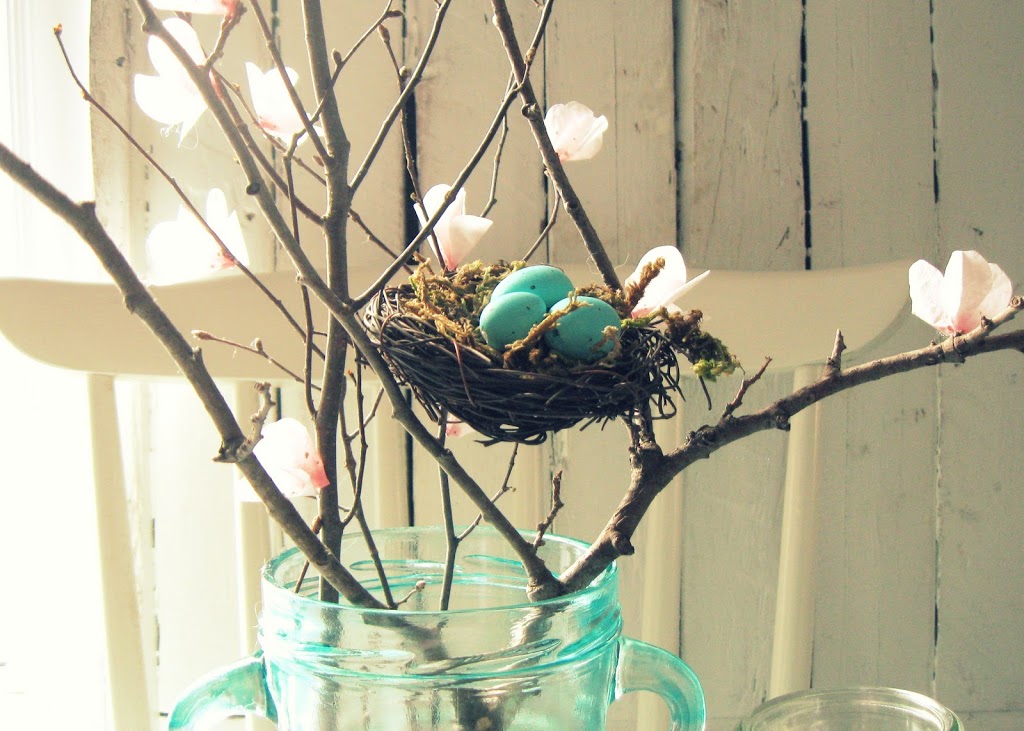
It’s such an easy craft and the results, in my opinion, are so adorable. The hardest part of this craft is venturing into the garden or the woods to find the perfect branch to stick these little beauties to.
I stuck mine with little dabs of glue. I have also found some other great tutorials for you to take a look, here and here and while you’re at it, please take a look here for a fantastic way to make those plastic cherry sprays look extra beautiful.


adorable just plain down adorable
beautiful!
Just gorgeous and your photography does it justice! I found you through The Girl Creative blog hop!
You always do the neatest things!
Very very pretty!!
Very Pretty !!
Lucy- How sweet and simple. Perfect little adornment for that sweet nest! xxoo Diana
BEAUTIFUL!
So cute! Perfect for spring!
now can you please come help me with my home? lol. love your stuff as always 😉
Exquisite and enchanting! I definitely need to go out and find a perfect branch so I can make one for my home. Where did you find those perfect little blue eggs? Jenn/Rook No. 17
Totally beautiful pictures! Very nice. Now I’m waaaay INTO making paper flowers of any kind and I had to do a double-take on these.
Just beautiful and so natural looking. It gives a peaceful feeling just to look at it. Thanks. You are right.God is a genius!!!
You do such lovely work! I’m your newest follower. Thank you!
Such incredibly clear instructions and photos! Thank you so much! I pinned this to my Pinterest. 🙂
I just ran across your blog. What an amazing artist you are! You make it all look so easy. I want you to be my mom!
awesome! thank you for the tips.
Just gorgeous. I love how your flowers came out and, the Robin Eggs as well!
your flowers are so beautiful and practical! Thanks for sharing.
Hugs