I grew up amongst canvasses and paint brushes, music notes and instruments.
There was always someone creating art or music around me and that is perhaps why I often refer back to my library of childhood memories when doing crafts.
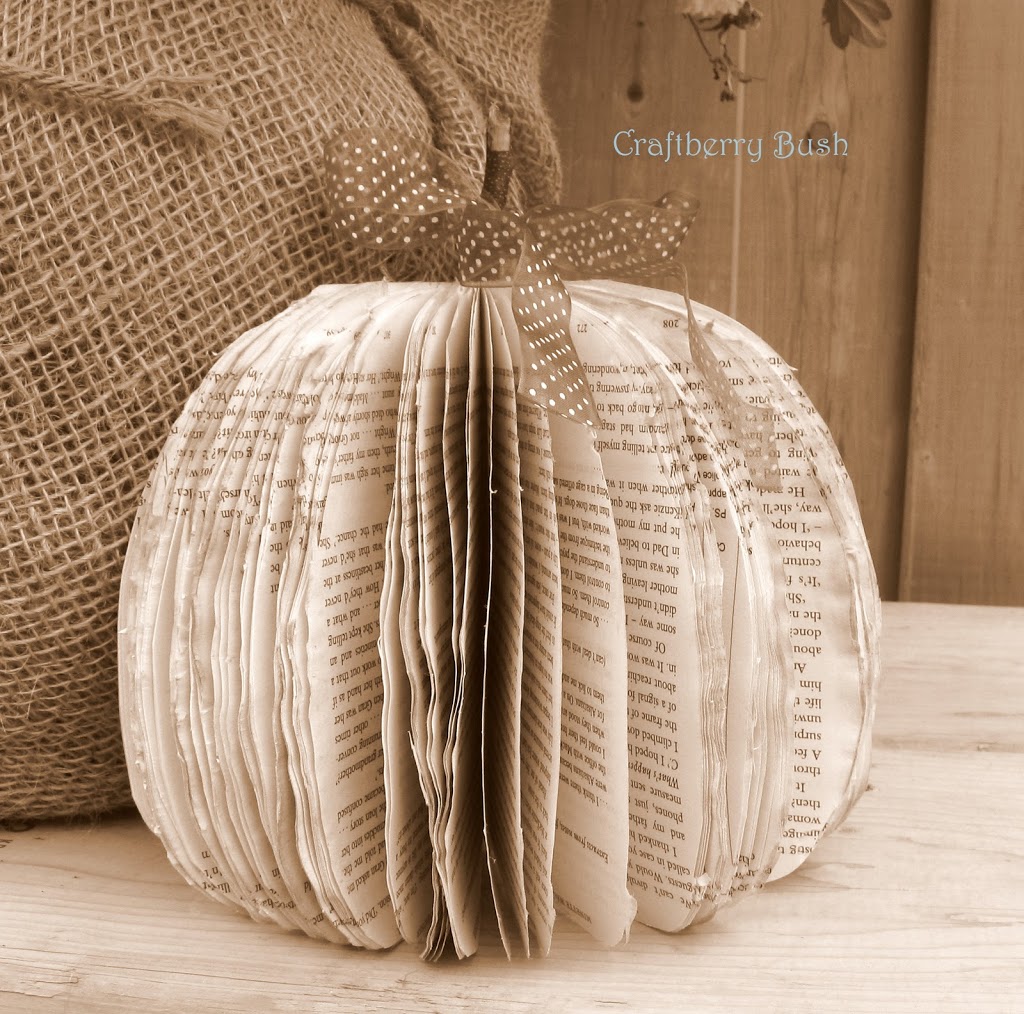
While doing this craft, I reminisced about a time sitting by my father’s feet and creating with him. As I turned each page of the book, I heard his wild stories and funny jokes which will always be archived in my heart.
During a recent visit to a local Urban store, my eye caught something that reminded me of my dad and his ‘crazy’ creations. They were simple frames covered in newsprint along with tote bags and baskets weaved from old magazines.
Even though we were not very recycle savvy back then, my dad would make little stools out of old telephone books for my brother and I. We would sit by his side and help him fold each page of the phone book until it would become a piece of furniture. Brilliant!

The materials:
Old paperback book
thick cardboard
scissors
ribbon(optional)
garden stick
exacto knife
hot glue gun
tea bag (optional)
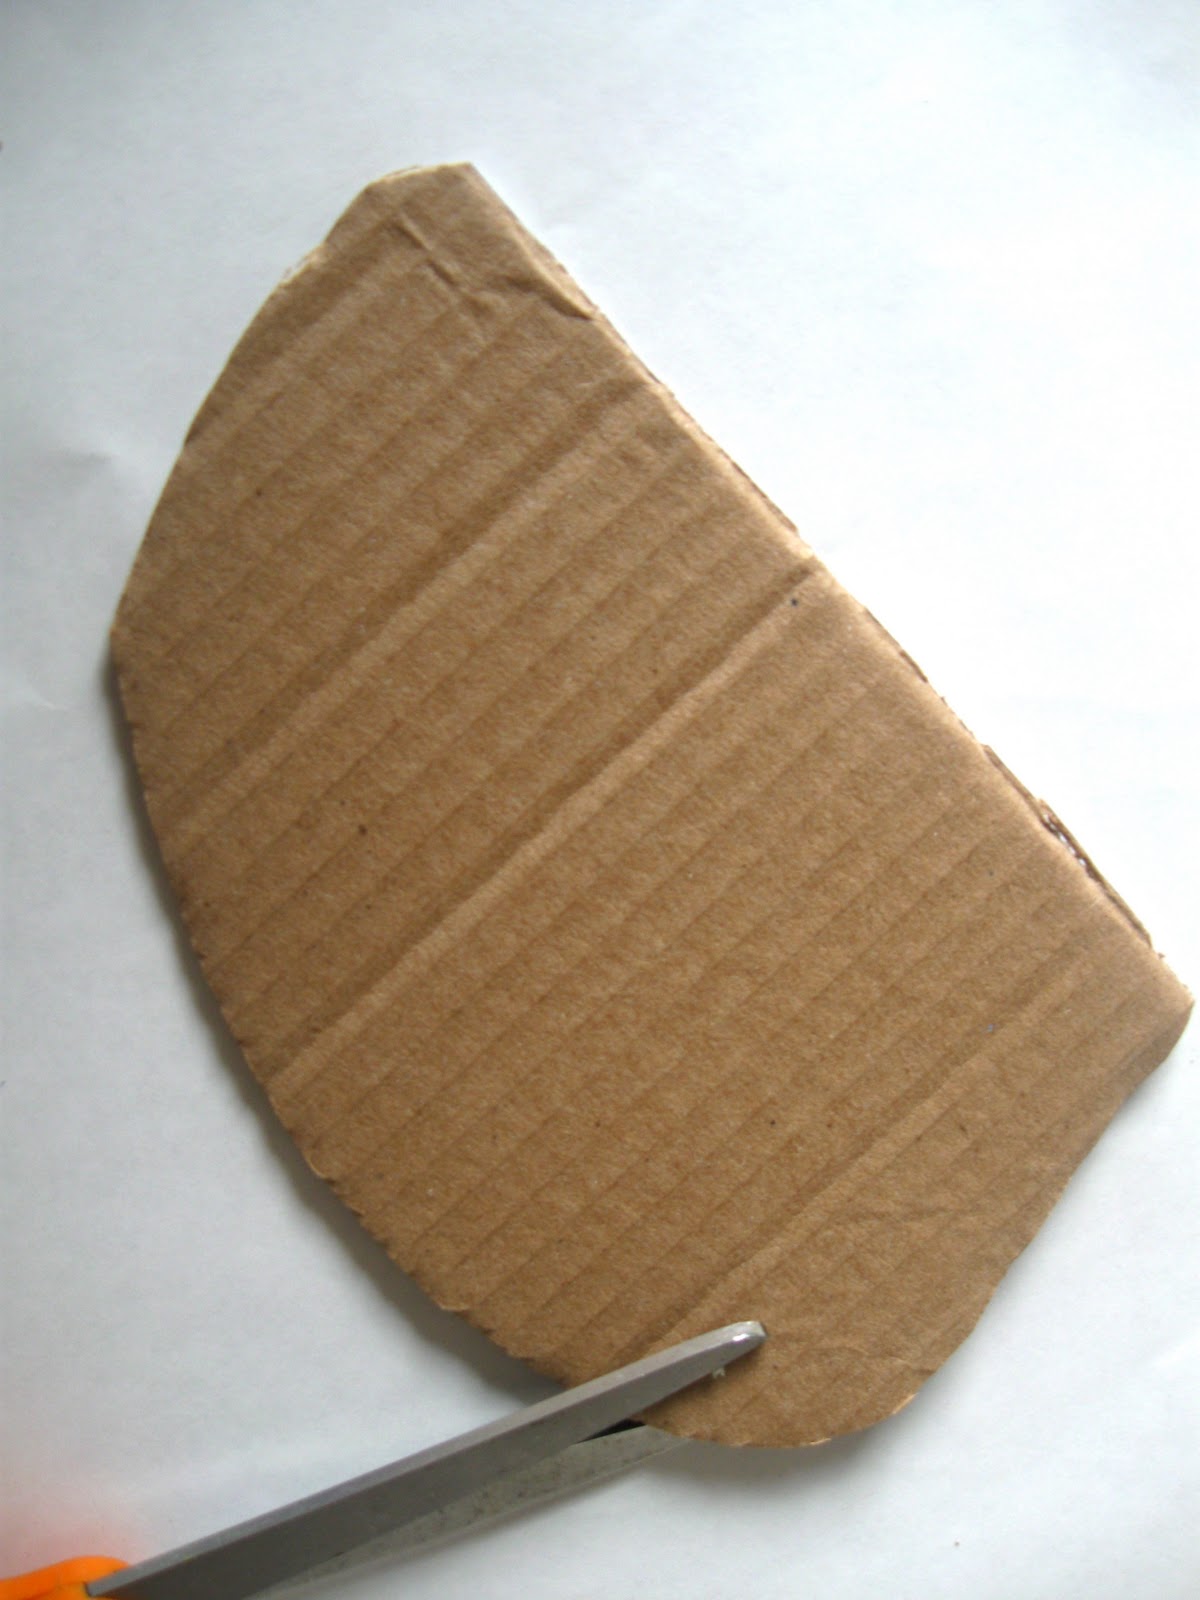
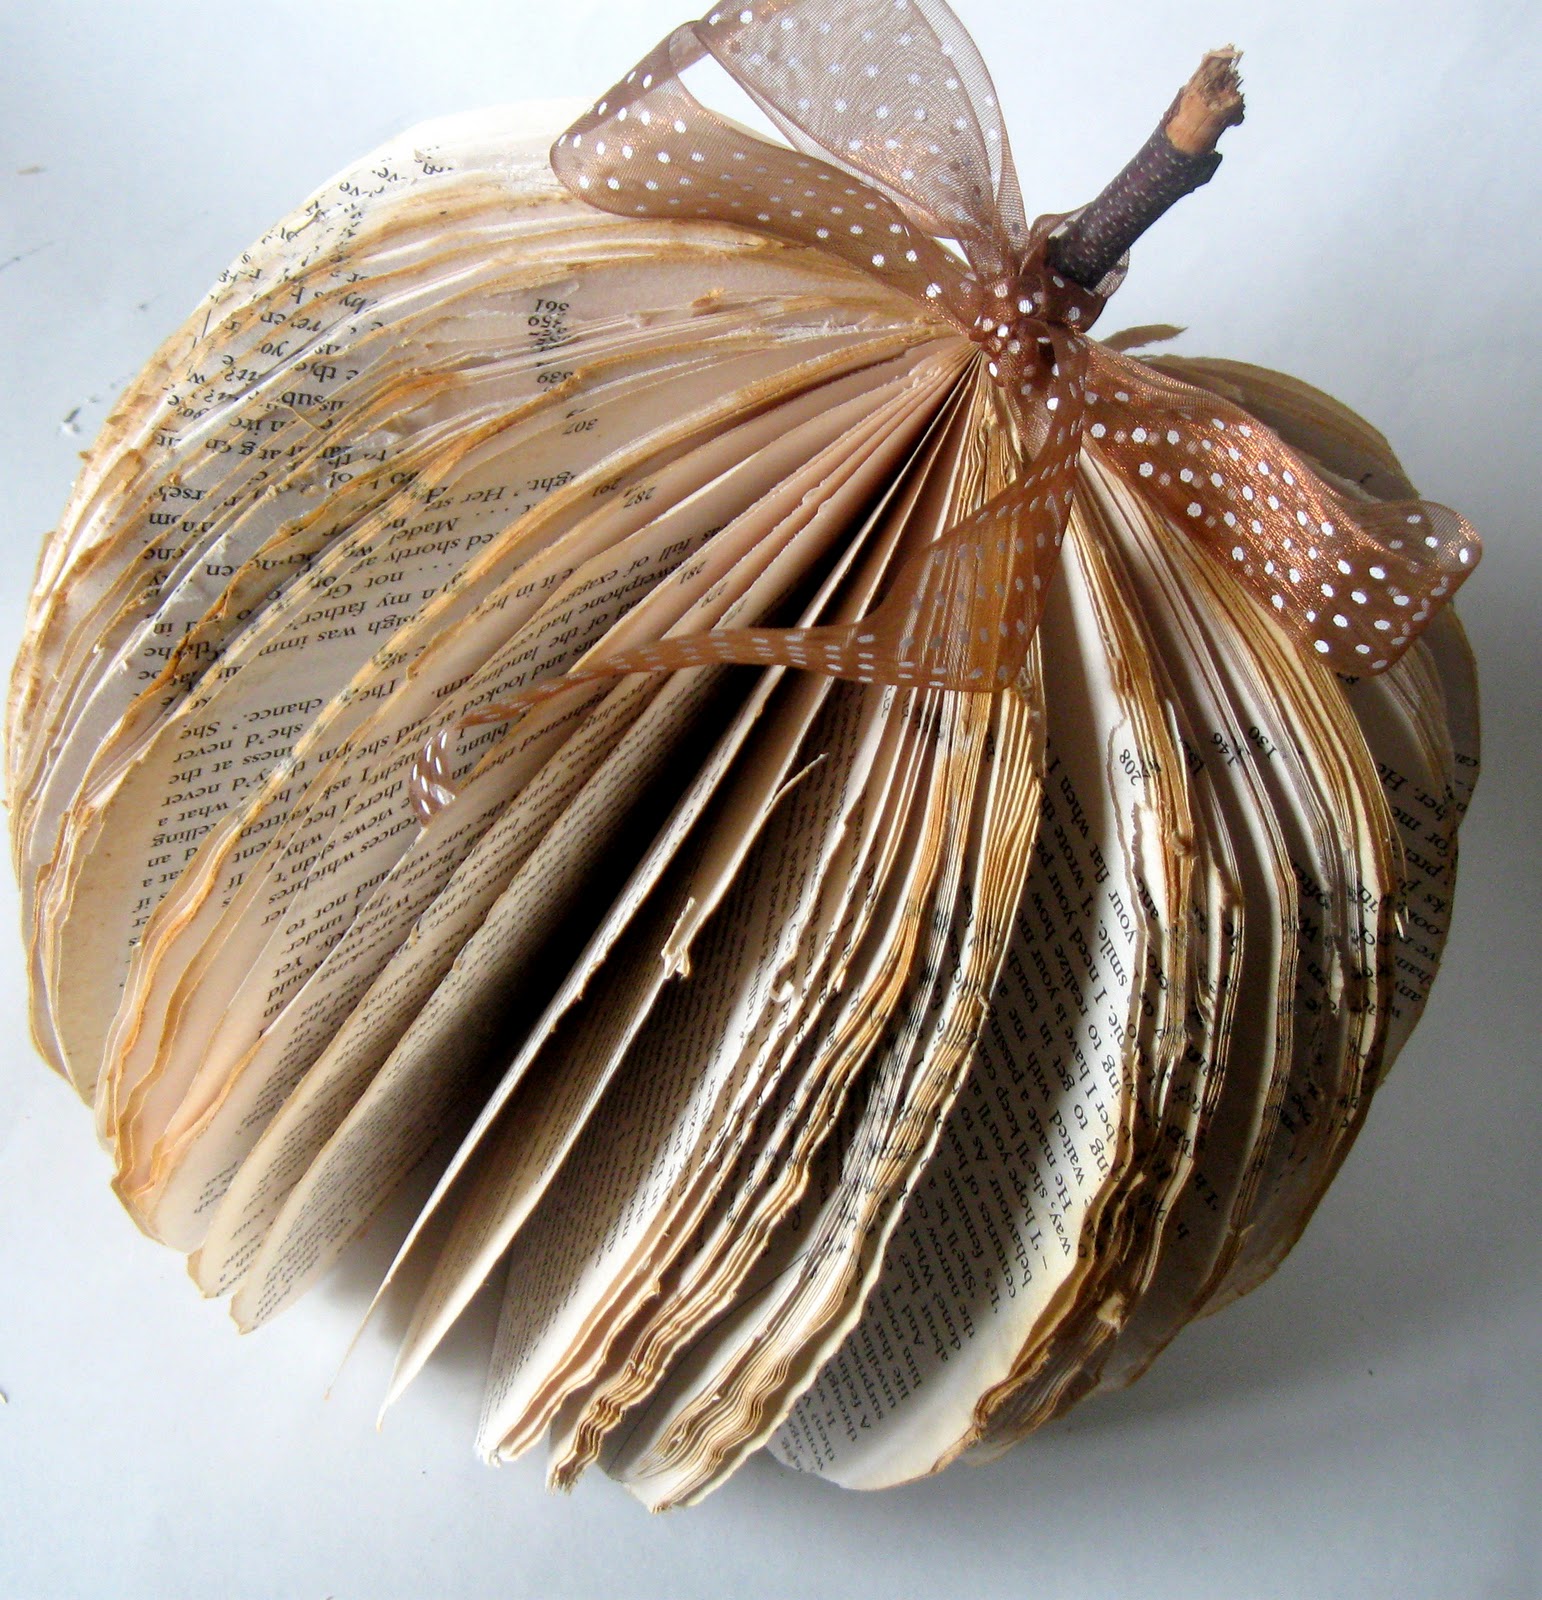
Draw the shape of your pumpkin on your cardboard and cut it out
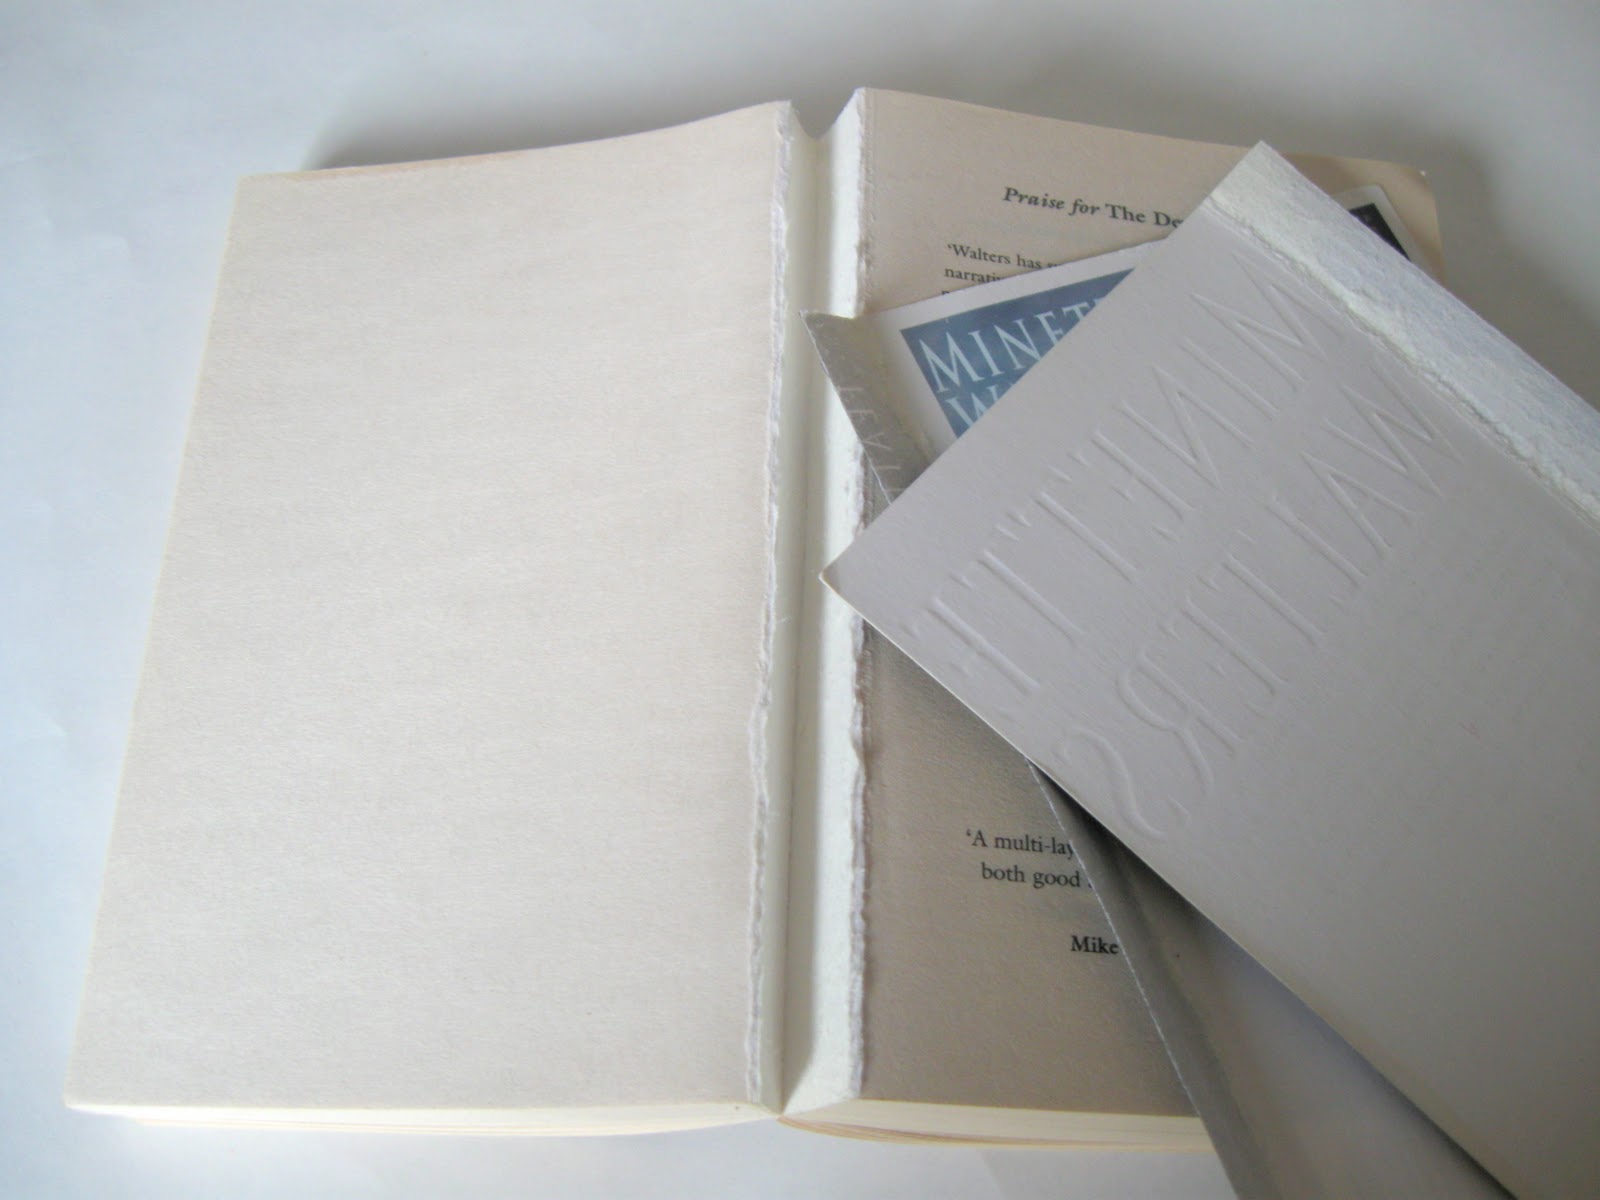
Remove cover from book
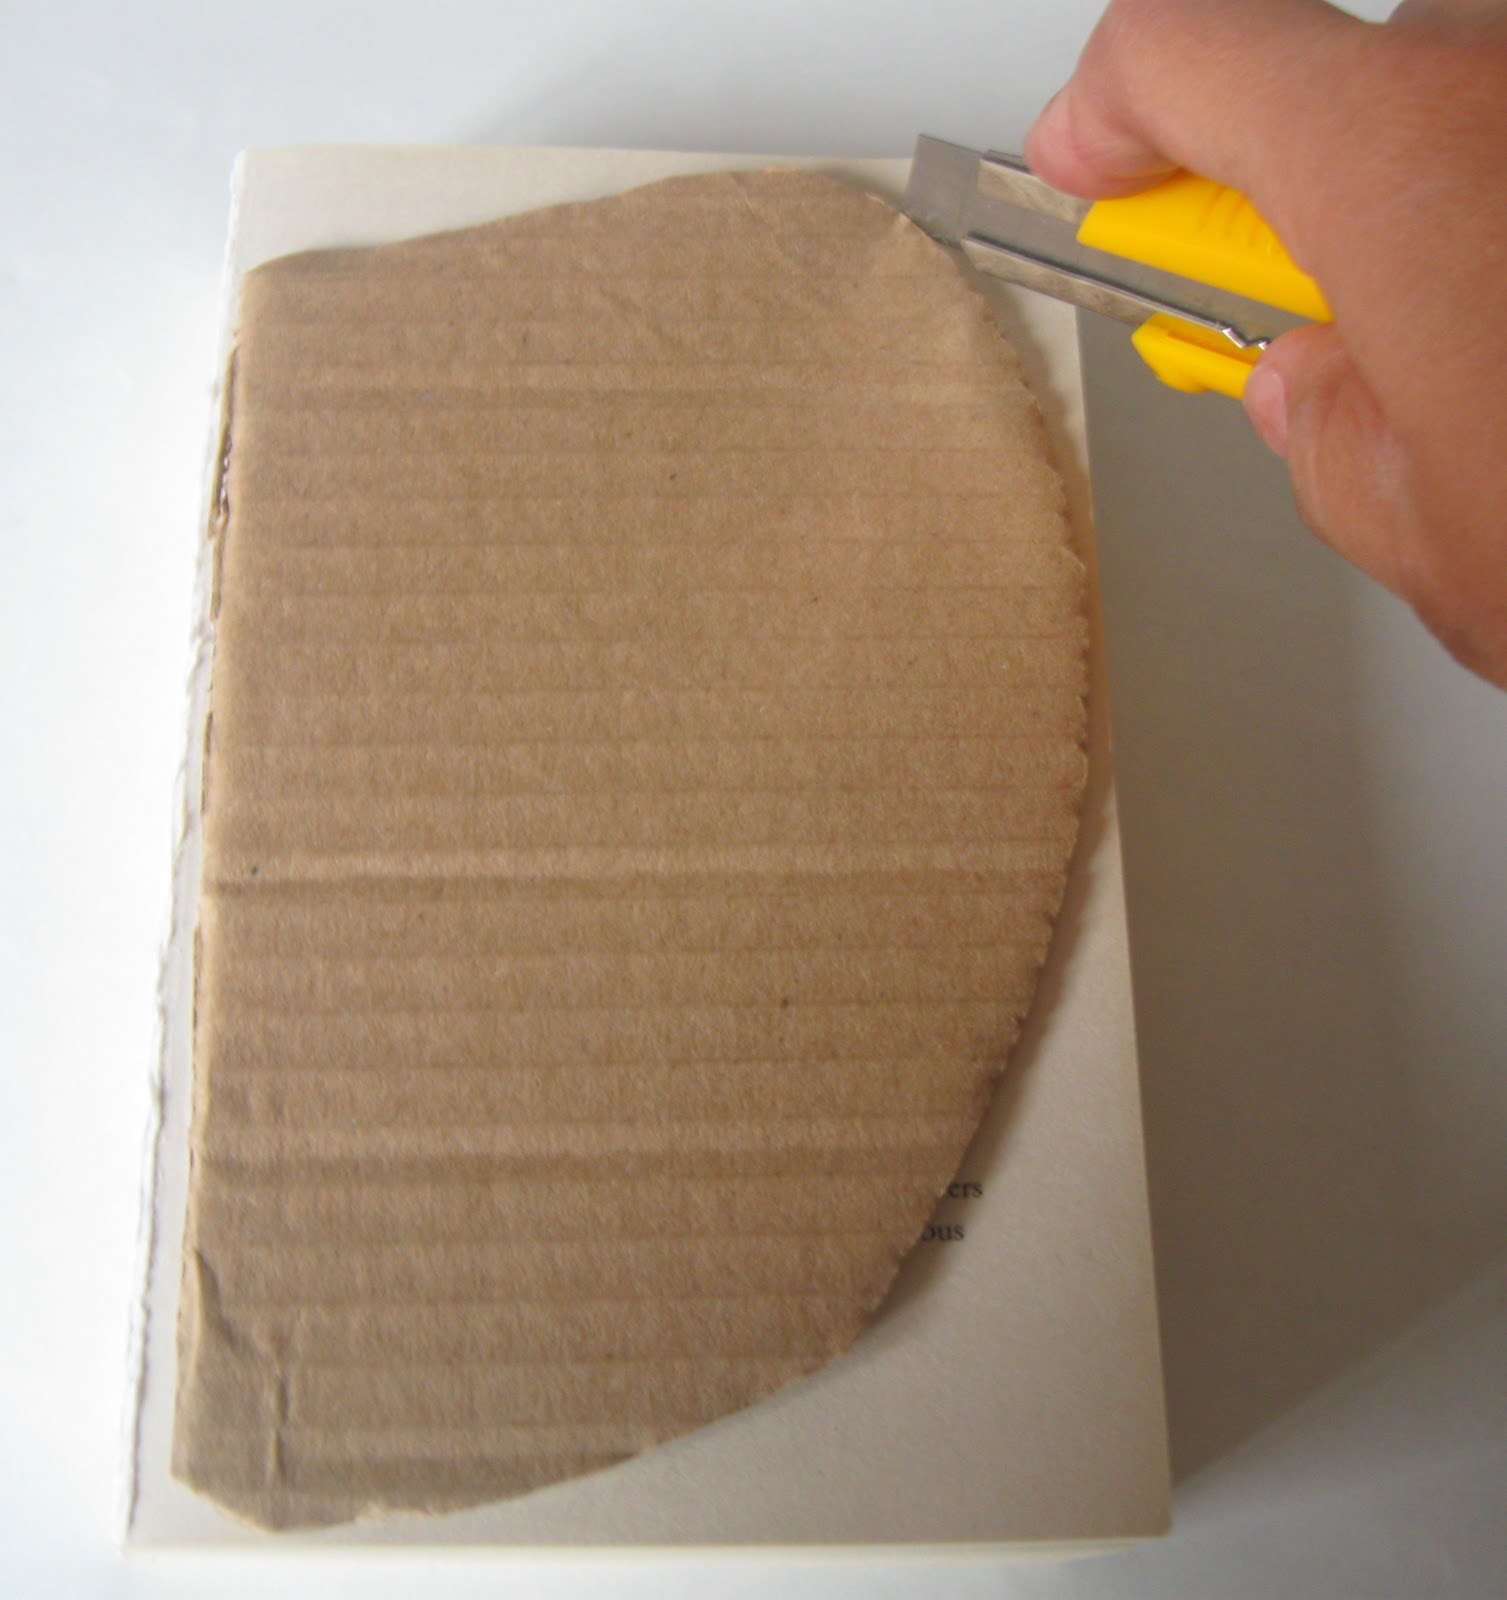
Place cardboard over book and cut along with exacto knife

You will have to continue cutting until you reach the end of the book
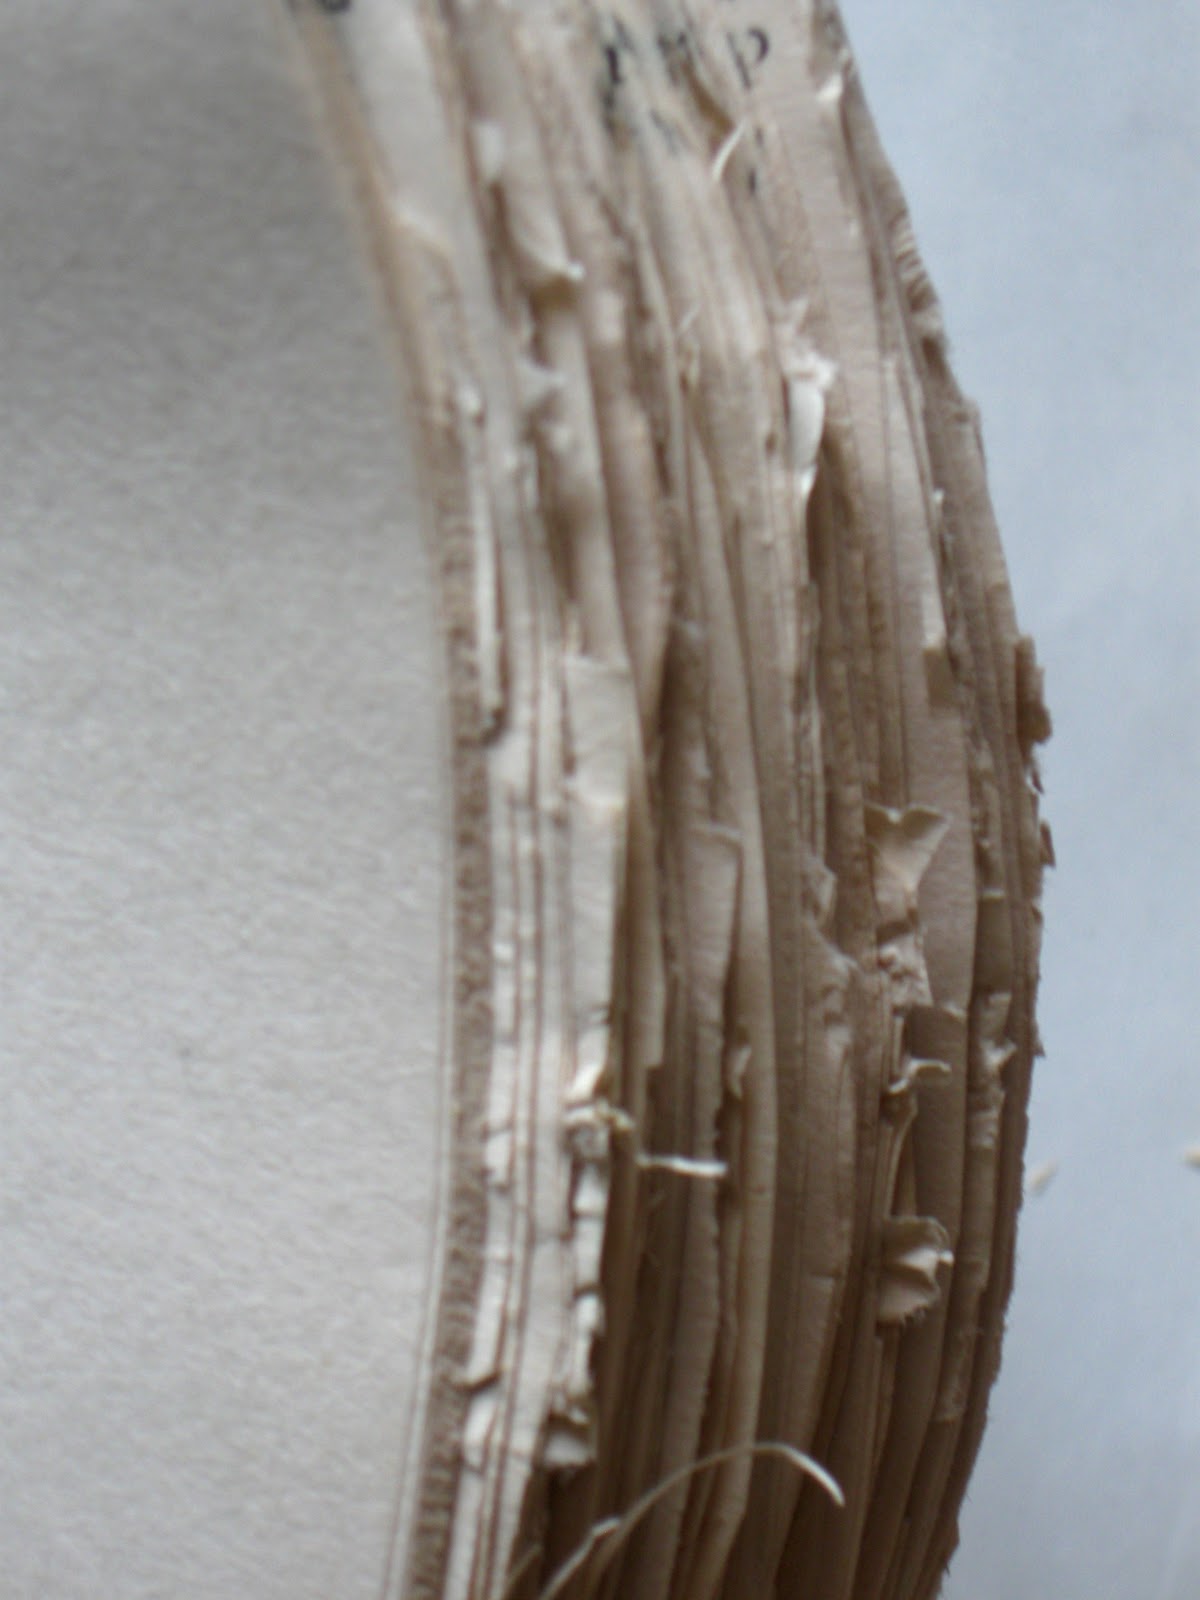
Trim all the little bits of paper (although I personally like the way this looks)
Make some tea!
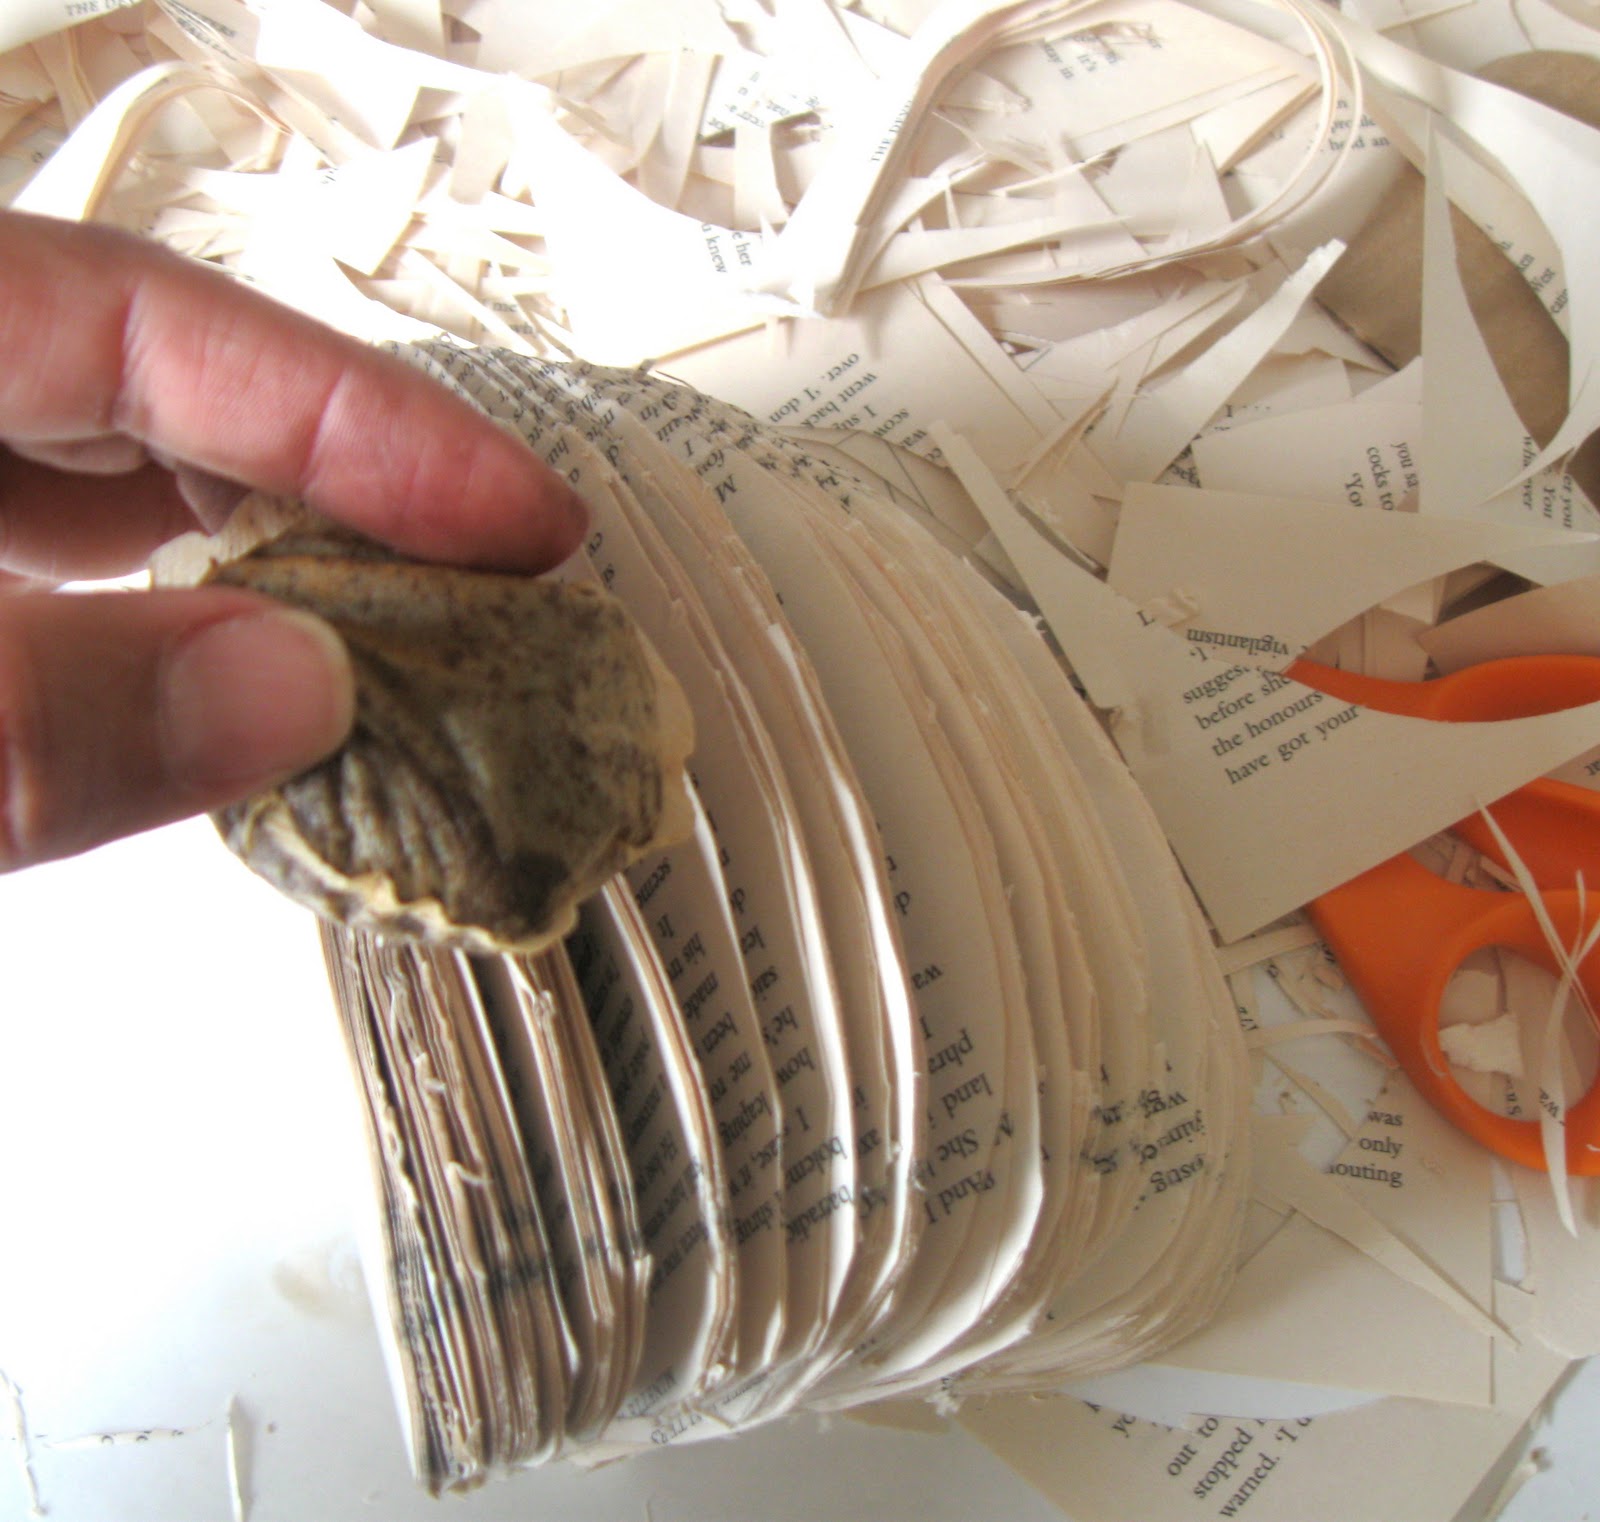
With the tea bag, stain the pages of the book
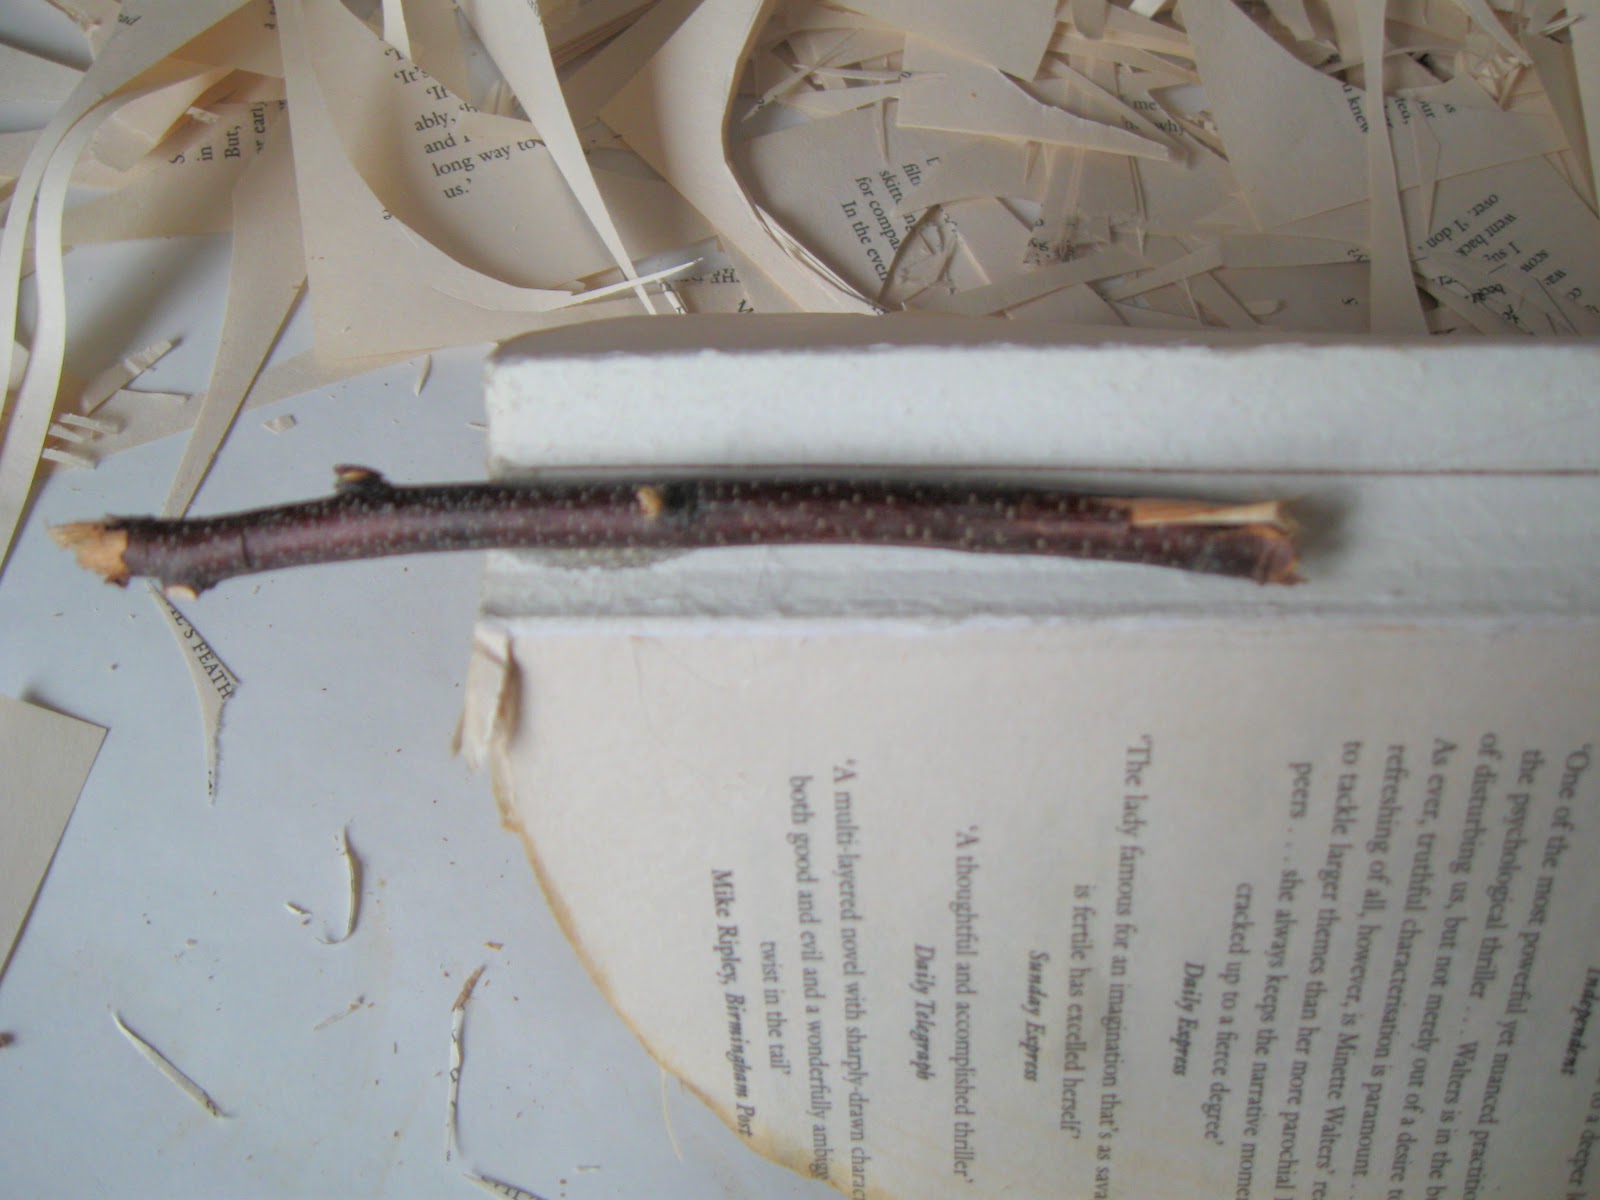
Glue the stick to the back of the book
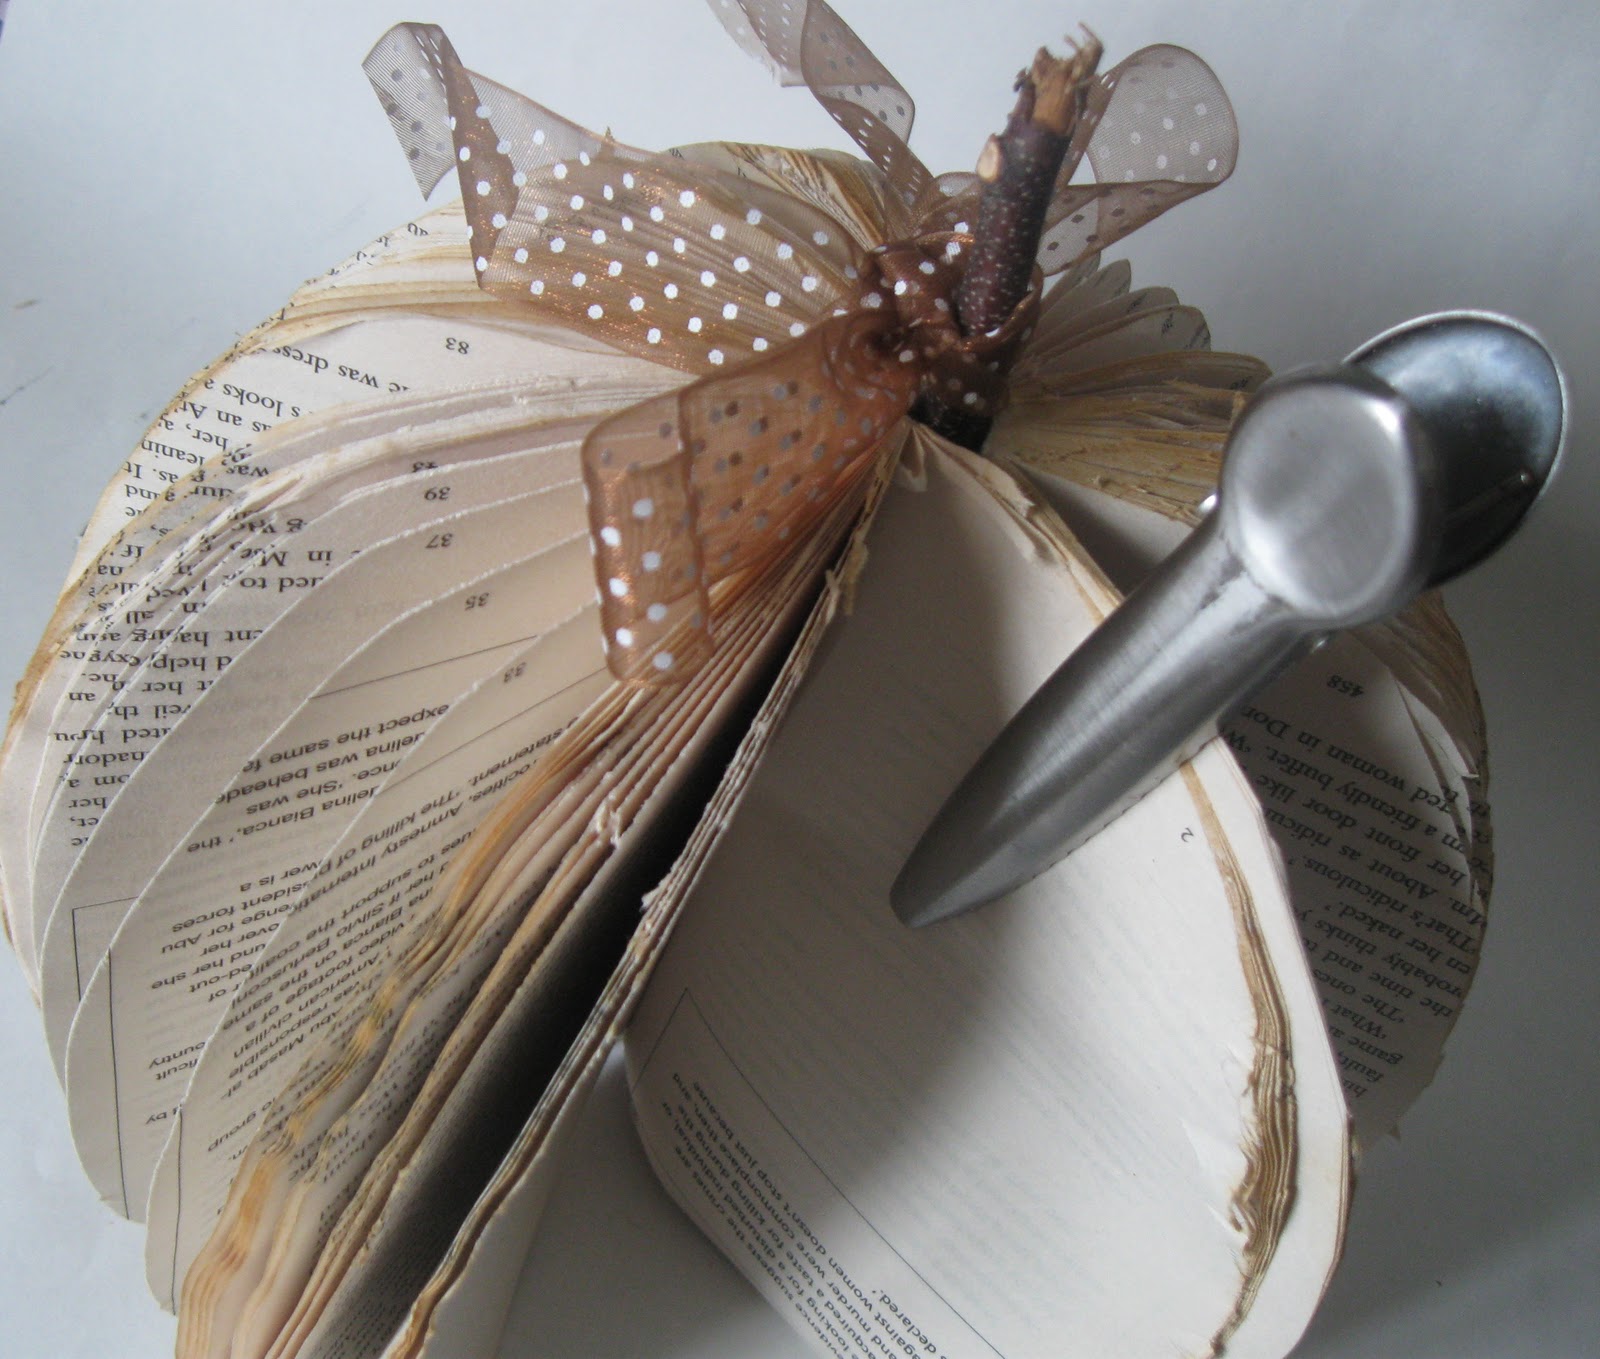
Glue some pages around the stick; the clip holds it while it dries
(note: my pumpkin will sit on a shelf, so for this purpose it’s better if the back is flat. If your pumpkin will sit on a desk or table, you will need to glue the back).
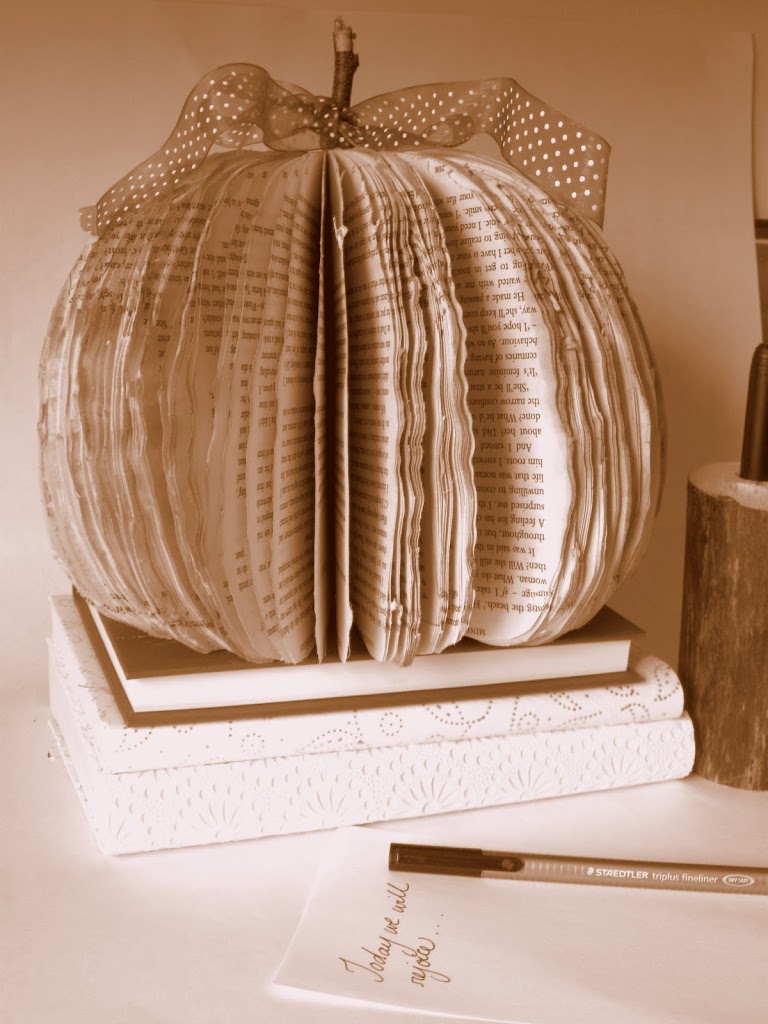
…and that’s all she wrote (get it? it’s a book…nevermind)
‘FALL’ IN LOVE ………
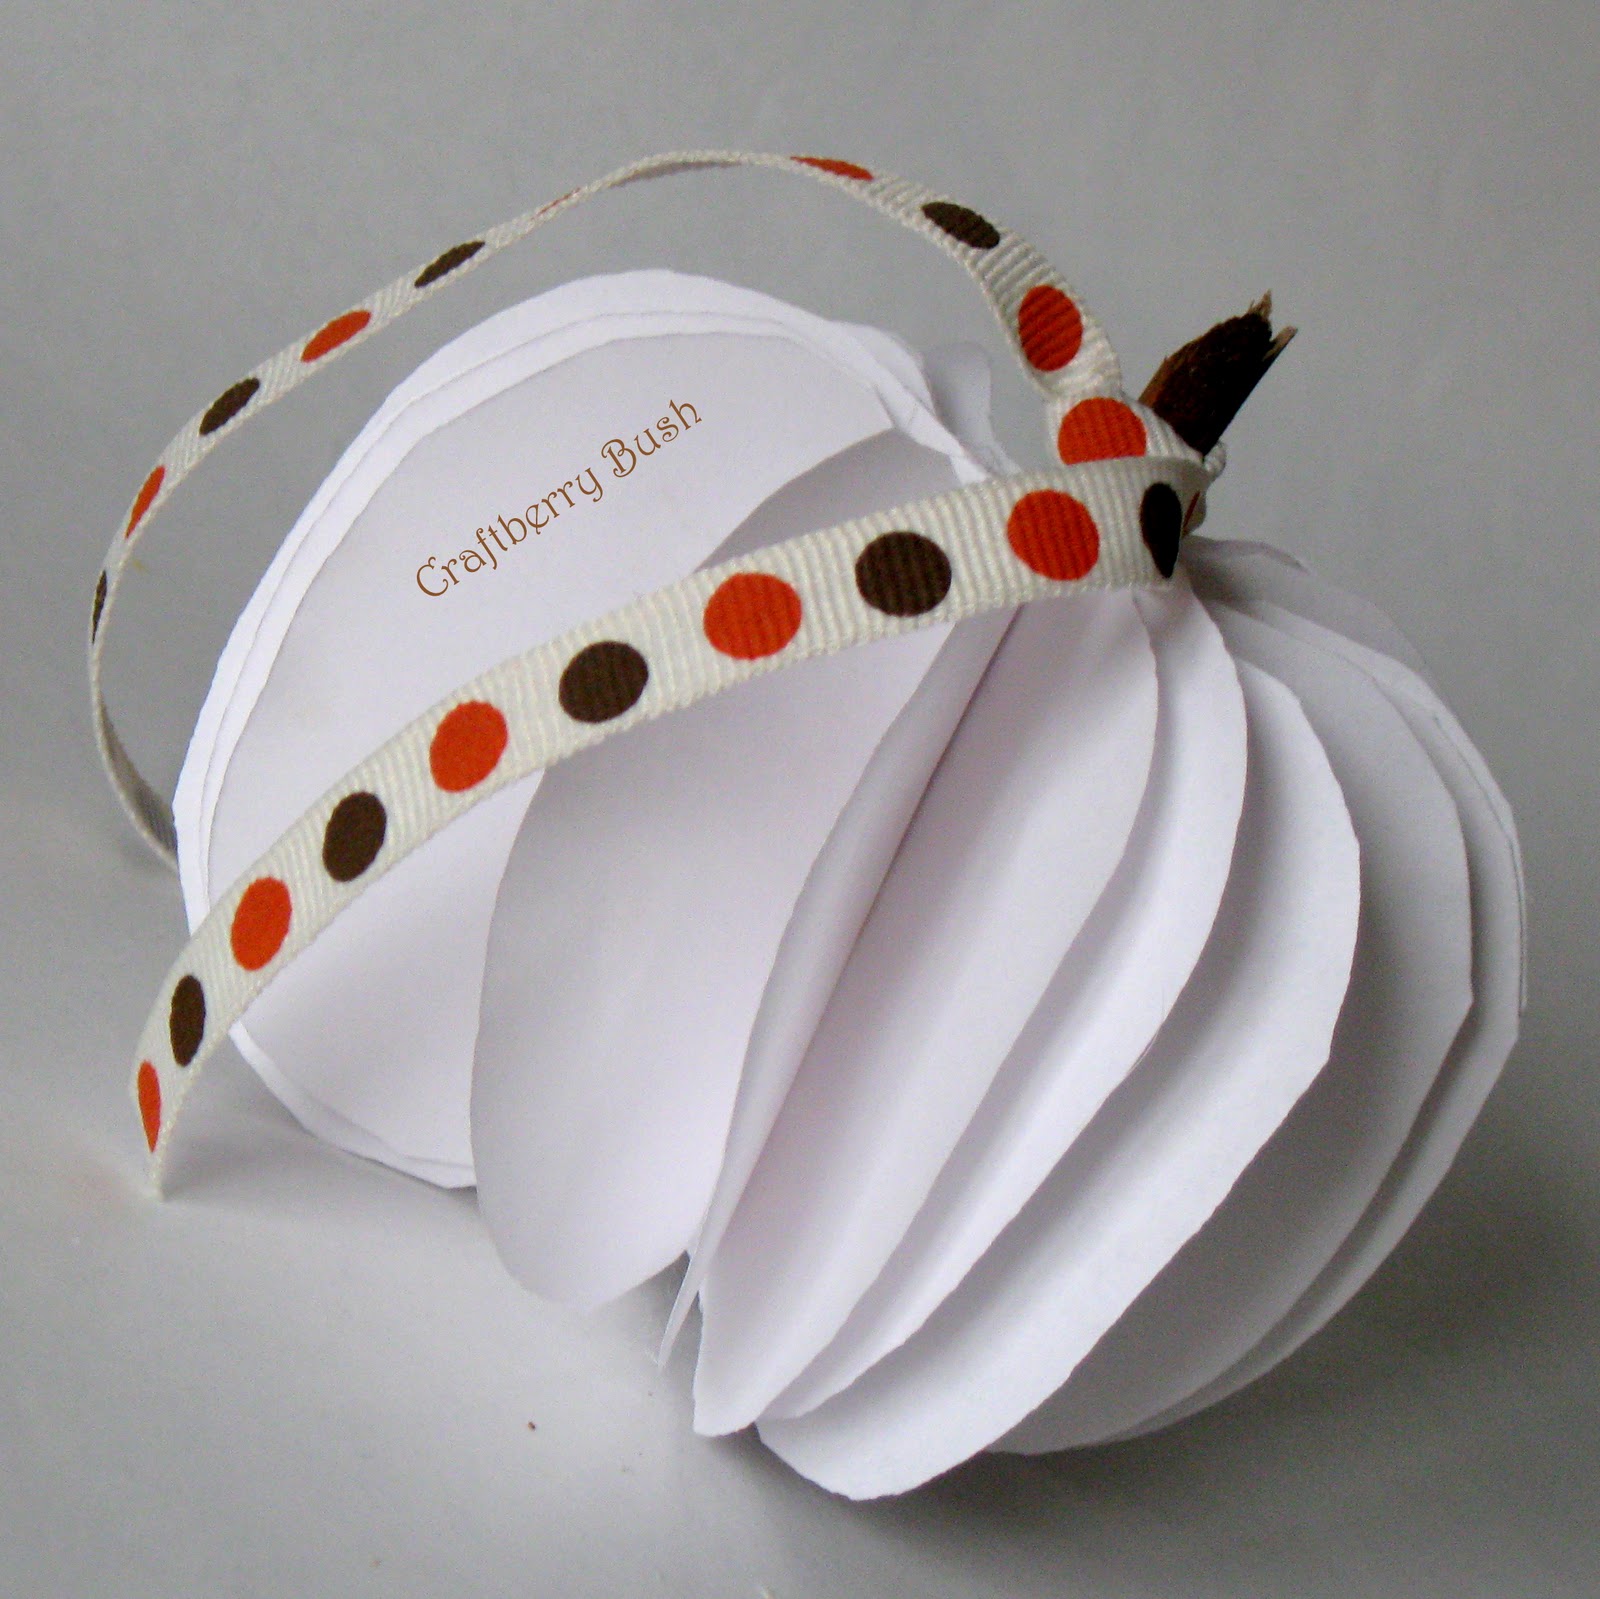
How about a little white pumpkin with the kiddies? Simply take some white paper and fold in half. Staple the centre to form a little booklet and have your child cut the ‘pages’. Glue a little stick and there you go. These would also make lovely place cards or you can make a streamer, so many craftberries….

An apple? Tres jolie!
Hope you enjoyed today’s Craftberry…………………..

Gorgeous craft, love that is attractive, simple, and low-cost (triple duty!)
i wish i can make this craft, too bad i’m not the handy type. 🙁
Thanks anyway” is appropriate where the person has not actually given you what you asked for. Imagine that I asked you for five dollars for a cup of coffee.
This is so pretty, thank you for sharing!
i gree with you this is so wonderfull and i will try it
i agree with you there, this is a piece of art!
So, so cute! I’m going to make one with some vintage books I just scored. Thanks for sharing!
Sarah
That is so adorable!I would love if you linked to my party!http://memakingdo.blogspot.com/2010/09/your-so-very-creative-linky-party.html
This is as cute as can be! What a wonderful idea. I really like the addition of the pretty bow.
That is so cute. I have made Christmas trees by folding pages before but have never seen a pumpkin. I am going to try it. Thanks for sharing.
That is such a great idea. Love your blog!
Oh….how unique! Love it ~ so happy I stopped by!!
I have to make this!! I love old pages and this pumpkin will be great! thanks for inspiring me.
LOVE This idea! I would love to have you guest post this tutorial over on my blog LOVE STITCHED. if you are interested please email me!!
Brittany@LoveStitched.Com
http://www.lovestitched.com
thanks 🙂
Hi. Love your pumpkin book! Very creative!
~ Julie
LOVE it:)
I love this! What a great idea!
Thanks so much….I so appreciate it your comments, they encourage me to post better and prettier things……..much love to all. :o)
This is ..great! I love it!
Thanks for sharing!
What an amazing blog you have! I’ll coming back!
Greetings from Amsterdam,
these are REALLY cute!
So cute!! I am loving this idea! Really really sweet! Coming over from Vanessa’s~ Nice to meet you!! 🙂
i just love this i remember early in the spring bloggers were making pears out of books….this be perfect to sit on a desk.
Very Clever. What a fun decoration.
Thanks for the great idea. I am going to make one for my librarian friend. She will love it!
Thanks for sharing the info, keep up the good work going, good job. I certainly get irked whilst folks consider issues that they plainly don’t know about
Love this! I made one for my mantel and linked it back up to you on my blog!
This is just adorable! I love this idea… so clever & unique. Thanks so much for sharing!
Such a great idea to make a shaped book sculpture! I love all the variations you showed us too, the teacher in me really likes the apple:) Thanks for sharing with us at A Crafty Soiree! Please join us next time too!
PS: I think you linked to your main page instead of this post. To get a direct URL to your individual posts click on the title and it will open in a new page. Copy and paste that into a linky party for a direct link. Make sense?
I love this! What a great idea!
Ohhh great idea!! Love it! Thanks for sharing!
great idea, it looks so beautiful:))…..
thanks for sharing…..:))
greeting from croatia:)….
M….
Now that took some patience. It looks wonderful (I like the one made from the book). Thanks for sharing!
I found your blog through pleasures of Homemaking -I’m sure glad she mentioned your blog on her post-your blog is amazing -You have already been placed under my favorites 🙂
What a fun idea! I might have to try it!
Hi there! I followed your instructions to make the adorable paper pumpkin and linked back to your instructions on my blog. Hope you get a lot of visitors! Here’s my post: http://ewehooo.blogspot.com/2010/10/paper-pumpkin.html
Love it! Thanks so much!
love it!
Hi! I am a new follower of your great blog! I too made a version of this cute pumpkin and linked back to your tutorial. Thanks for all of your clever ideas! here is my link: http://do-rahdesigns.blogspot.com/2010/11/paperback-novel-pumpkin-tutorial.html
Sooooo cute!!!!
Hugs, Carolyn ~ Cottage Sunshine
Featured you today!
http://cleverlyinspired.blogspot.com/2010/11/i-was-inspired-to-make-these.html
these are awesome x TFS x
I loved your pumkins and linked this to my “book pages” post!
Stopping by from today’s blog hop and am your newest follower. I hope that 1 of my blogs interests you too.
http://tawnasplan.blogspot.com
http://btrbb.blogspot.com
http://tawnassecret.blogspot.com
Thanks
Tawna
This is the cutest pumpkin I have seen on any blog. really.
Janice
ps: I should have said which one the pumpkin made out of a book and then your tea died the edges
Janice
So making myself some of these! Very creative!
{SO CLEVER}
CUTE! I think I might have to try this!
this was so awesome I had to um, be inspired by it…
http://shimmerandtulle.blogspot.com/2011/09/youre-smart-pumpkin.html
I just found your blog. Love your paper pumpkins and would love to feature them on my blog For the Feature Me Daily for Thursday Oct. 20th for the day. I would love it if you would come by and check it out. My blog is http://www.scrappingpinklady.com
Lisa Scrappingpinklady
I love this and your blog. I am now following you!
You can visit me at mymodernguide.blogspot.com
Beki
Hi, loved this…so much that I made it myself. Problem is my pumpkin doesn’t fan out. Like at all. Any words of wisdom?
I’m loving this idea. I’ll have to give it a try and if it works out, I’ll post it to my blog and link back to your tutorial. Thanks!
http://titus2workinprogress.blogspot.com/
these were so cute i had to try them out myself! my mantle & i thank you for your tutorial :o) i linked it back to you here…http://2texansandalittlerussky.blogspot.com/p/shes-crafty.html
happy thanksgiving!
I posted mine on my blog and linked back to your instructions. Just wanted to share it with you! http://titus2workinprogress.blogspot.com/2011/11/book-to-pumpkin-and-other-festive-stuff.html
wow! Amazing handcrafted. I like it all!
parfum | rumah dijual | perlengkapan bayi | jakarta hotel | properti semarang | party organizer
I am confident they’ll be benefited from this website.
Parfum Original
Sepatu Wedges
Absolutely ingenious! LOVE it!
Gorgeous!! How about a tutorial on that phone book stool thingy?
🙂
Love them. What did you use to color the red on the apple. Thanks.
I have recently made one of these myself and have added a link to yours on my post. LOVE IT.
I’m sorry but this is not recycled, this is destroying something that someone else could put to good use. It upsets me so much when people come up with *recycled* ideas for books. If you want to recycle a book, donate it to someone who can’t afford to buy one or your local public library.
Lucy, it sounds like you had a wonderfully creative childhood surrounded by art, craft, and music.
Saying “and that’s all she wrote” at the conclusion of your book-pumpkin tutorial was very funny. I love the weaving of words.
When you mentioned the stool you created with your father, it reminded me of doorstops created by my great-aunt (who was not only a top-notch recycler, but also had a noggin designed for knitting and complicated math calculations).
Having taught high-school math, she was my algebra tutor. I did not absorb the math, but did learn how to make the doorstops. Hers were created from big, thick Sears and Roebuck catalogues. She folded each page diagonally – down from the outer corner to the center and when she was finished, the doorstop was shaped like a tiki hut.
nice handmade!
Parfum Original Murah
Jual Sepatu Wanita Online
Sepatu Wanita Murah
Thank you for sharing this idea. This is definitely perfect for paper pumpkins for Halloween or paper bells for Christmas. This recycling idea will definitely help in reducing paper wastes; thus, helping preserve what is left of our environment. Again, thank you for this post. This is such an inspiration.
Good morning, I found your book pumpkin on Lamberts Lately and wanted to let you know tht I have featured your cute pumpkin on my
Wordless Wednesday 10/1 Hope you can stop by and add your blog.
Have a great week,
Oh My Heartsie Girl
Karren
This recycling idea will definitely help in reducing paper wastes; thus, helping preserve what is left of our environment. Again, thank you for this post. This is such an inspiration. Kemeja Pria Slim Fit | Kemeja Kerja Pria | Blazer Pria
Lucy, it sounds like you had a wonderfully creative childhood surrounded by art, craft, and music.
Saying “and that’s all she wrote” at the conclusion of your book-pumpkin tutorial was very funny. I love the weaving of words.
When you mentioned the stool you created with your father, it reminded me of doorstops created by my great-aunt (who was not only a top-notch recycler, but also had a noggin designed for knitting and complicated math calculations).
Having taught high-school math, she was my algebra tutor. I did not absorb the math, but did learn how to make the doorstops. Hers were created from big, thick Sears and Roebuck catalogues. She folded each page diagonally – down from the outer corner to the center and when she was finished, the doorstop was shaped like a tiki hut.
PaketLiburankeBali.org
Thank Before…Glad to Read this Article.
Jaket Anak , Celana Anak Perempuan, Celana Anak Laki , Baju Anak, Sweater Anak
The article posted was very informative and useful
thanks for sharing.
jaring futsal , jaring futsal murah , jual jaring futsal , toko jaring futsal , agen jaring futsal , jaring golf , jual jaring golf , jaring golf murah ,
jaring polynet , tangga darurat , jaring truk , jaring cargo , jaring outbound , jual rumput futsal murah , jual rumput sintetis murah ,
tali tambang , cargo net , jaring tanaman , jaring kassa , jaring proyek , jaring bangunan , jaring gedung , jaring pengaman proyek ,
jaring pengaman bangunan , jaring pengaman gedung , jaring peneduh , jaring waring , kasa hijau , tangga darurat , jaring gawang futsal , jual jaring gawang futsal murah , jaring peneduh , jaring truk , tali tambang nylon
Check my website.
San Diego Hills | Parfum
amazing articel, thanks for share with us this excellent read
dress wanita | tas ransel pria | sepatu pria | tas laptop | fashion pria | pakaian pria | baju pria
Kemeja Pria
Kemeja Pria Terbaru
Jaket Pria
Jaket Online
Celana Jeans Pria
Pusat Kemeja
This is wonderful and I love it thank u soooooooooooooooooooooooooooooooooooooooooooooooooooooo
Much only because of u I got an idea and also by doing this I got good name and fame in the school
Once again thank u very much
Thank u for ur appreciation
I really enjoyed reading this post, I always appreciate topics like this being discussed to us. Thanks for sharing.
I really enjoyed reading this post, I always appreciate topics like this being discussed to us.
thanks for sharing I like this blog many informastion for me
Hi, Thanks for your marvelous posting! I am really impressed with this blog.It is easy to see that you are impassioned about your writing.
hi thank you for share this article
Thanks for sharing your information, its great and i appreciated about it!
Hello! I could have sworn I’ve been to this site before but after reading through some of the post I realized it’s
new to me. Anyways, I’m definitely glad I found it and I’ll
be book-marking and checking back often!
Iam really impressed with your writing abilities and also with
the structure in your weblog. Is that this a paid subject matter or
did you customize it yourself? Anyway stay up the excellent high quality writing, it
is uncommon to peer a nice weblog like this
one these days..
Hello my friend! I wish to say that this post is amazing, nicely written along
with contain almost all significant information. I’d
like to see more posts such as this.
This is a good site! come on and join with us!
must say that overall I am really impressed with this blog. It is easy to see that you are passionate about your writing. If only I had your writing ability I look forward to more updates and will be returning
Keep up the great piece of content, I read several posts on this site and I think that your web blog is truly attention-grabbing and
also contains plenty of outstanding information.
I have to make this!! I love old pages and this pumpkin will be great! thanks for inspiring me.
That is so cute. I have made Christmas trees by folding pages before but have never seen a pumpkin. I am going to try it. Thanks for sharing.
This is as cute as can be! What a wonderful idea. I really like the addition of the pretty bow.
. Haul off surplus debris or use a composter to recycle and market organic refuse. Offer to drag or amount the cleared spot. eighteen. Organization Gear. Purchase surplus equipment from bankruptcy product sales and auctions. Retailer and clean-up, but never fix (allow purchaser do this).
I really love to read such a nice article. Thanks!Keep rocking.
awesome creation, love to try that sometimes!
very cute! i think i’m going to try this later on this week. thanks for the tutorial!
Absolutely fantastic posting! Lots of useful information and inspiration, both of which we all need!Relay appreciate your work.
judi poker
free download to convert HD camcorder files. convert avchd video files to
avi, mp4, wmv, mov mts to avi mp4 mov mkv iMovie
I had to convert 2 seasons of the movie to watch it on the tablet on the plane (the tablet is old and not very friendly with the MKV format). At first I used the trial version of https://www.movavi.com/support/how-to/how-to-convert-video.html – I liked it, so I bought it. And in about half an hour I converted 16 gigs. I set the converter to background mode and minded my own business on the internet. I really like this program.
Currently it looks like WordPress is the preferred blogging platform out there right now.
(from what I’ve read) Is that what you’re using on your blog?
what a wonderful craft, i wish i can make them on my own.
Execelletn craftmanship!
I just want to say thanks for your wonderful post, it is contain a lot of knowledge and information that i needed right now. You really help me out my friend, thanks !
Remarkable! Its genuinely amazing paragraph, I have got much clear idea
about from this article.
Hello friends, its fantastic paragraph regarding cultureand completely defined, keep it up all the time.
It frequently is amazing to me how site owners such as yourself can find some time along with the dedication to carry on composing outstanding discussions. Your website isgreat and one of my personal need to read websites. I just needed to say thanks.
with love we can live together
I read this paragraph fully regarding the comparison of most recent and preceding technologies,
it’s awesome article.
After checking out a handful of the blog articles on your web
site, I honestly like your way of blogging. I bookmarked it to
my bookmark webpage list and will be checking back soon. Take a look at my web site as well and
let me know your opinion.
I read this paragraph completely concerning the resemblance of
latest and preceding technologies, it’s amazing
article.
can you visit me in here
don’t forget visit me in here ok
Explore our curated collection of thank you quotes, including sub categories for weddings, baby showers, teachers, and business situations.
Cómo cuidar el primer cabello es que puedes hacer tu propio champú con materiales naturales. Como el aloe vera y el aguacate. En este articulo
I’ll right away grab your own feed once i are not able to to locate the e-mail registration link or perhaps e-newsletter company.. judi kasino Complete you might have every? Nicely allow for myself know to make sure that I may sign up. Thanks.
Such A Nice Idea, Very Creative, Love It!
Link Alternatif SBOBET
Hi Lucy, love your creativity!
in my opinion the work you created from the paper is very creative and you can post your other works? because I think very creative and cool to show to friends
Very nice, thanks for sharing this informative data.
Thank you for the information
indobola338 is one of the most trusted online lottery sites with the most complete range of lottery markets. There are also results of spending on SGP data results, for information on SGP data, click this link http://indobolabet.info/data-sgp/
how if i want to know more about your site ?
Welcome to football web betting online. We provide an online betting for football match.
Check it out: Judi bola online terpercaya
– Jackpot bonus in daily basis
– Quick process for deposit and withdrawal money
– Member referral for new member up to 30%
– Cashback bonus up to 15%
Salah satu situs yang sangat berhubungan dengan togel online adalah situs Pengeluaran togel karena situs pengeluaran togel memiliki fungsi untuk memuat daftar atau data informasi seputar keluaran togel online.
i like the ideas,. maybe i should made 1 ..
pengeluaran togel terpercaya
Never enough about knowledge
Education is very good and many knowledge
TEMBAK IKAN ONLINE, LIVE CASINO SLOT ONLINE, ONLINE dari produk Joker123 Gaming,
rajaremi
Domino99 Terpercaya
Infobets adalah sebuah agen poker online yang memiliki bonus terbesar serta pelayanan terbaik. Segeralah bergabung di hoyajackpot saat ini juga.
Positive site. where did IDN Poker Online come up with the information on this posting? poker online
Canlı bahis Cratossporting
izmir lazer epilasyon hizmetleri
izmir lazer epilasyon hizmetleri
your page is very good at sharing a number of useful information, so am I sharing information and please see Click Here
I also share information from good page, please see The page you were on is trying to send you to Click Here
Very good work and very interesting, I am happy to be here and be part of your site which is very popular ..
A very pleasant site and I hope to work with you so that we can both provide the best for our website.
Thanks for sharing your thoughts about result sgp. Regards
The most actual and interesting information for the readers who visit here, hopefully they can continue to work to provide interesting things every day, I hope the site that I develop will be like this and I hope to be able to help each other.
good blog huh ..
thanks for your sharing ..
remarkable work here. I only wish I had your talents. Good job mate!
DivaQQ adalah daftar situs Taruhan bandar domino agen qq poker PKV online resmi terpercaya dan paling populer di Indonesia
I am genuinely grateful to the holder of this website who has shared this enormous
article at here.
PINGU is playing alone with wooden blocks when Pinga comes along and his tower collapses. In revenge he puts her ball just out of reach. Later he can’t find the ball and assumes a thief has taken it. Outside he spies a stranger and thinks that he can see he has the ball. He challenges him but he is mistaken the stranger does not have the ball. When he gets home he finds the ball in Pinga’s bed where she had hidden it.
Father demands that PINGU puts everything in its right place. PINGU puts all his toys into his toy chest and then puts Pinga’s toys neatly in their places. Whilst he is putting her toys away Pinga has taken PINGU’s locomotive out of the chest and is playing with it outside. Pingu tries to take it away from her to put it away again but Father encourages them to go out side and play together. When Father comes back there are toys all over the floor again but he realises that children will always make a mess and stops worrying about it.
Hiya! Quick question that’s totally off topic. Do you knoԝ how to make your site mobile friendly?
Μy blog looқs weird when browsing fгom my apple iphone.
I’m tгying to find a theme or plugin tһat migһt be
able to resolve thiѕ ⲣroblem. If you һave any suggestions, pⅼease share.
Ꮤith thanks!
Mother sends PINGU to the baker’s to fetch the bread bu in the process he steals a cake. He attempts to conceal is from his mother but she spots it and he has to go back to the baker’s shop and apologise. As a punishment PINGU must clean the chimney, which he promptly falls down but gets a cake as a thank you anyway. However PINGU is not best pleased when he discovers that, whilst he has been washing off the chimney dirt, Pinga has eaten his reward.
I have read all the comments and suggestions posted by the visitors for this article are very fine,We will wait for your next article so only.Thanks!
This is a good article. I’ll see you well! Please come and check our webpage ^^ There is a lot of good information! I found a very useful and good article. I will visit you often in the future. Always show good content often.
I wish I could make as exceptional and smooth as this.
all the articles here are extremely useful as far as anyone is concerned, everything is exceptionally straightforward and exceptionally basic.
Very shocking article, I can isolate this article different events.
I’m going to see some good stuff. I will visit you often in the future. Please also visit our blog.
토토사이트
Cara berikutnya dan menjadi ciri-ciri patut diketahui oleh calon member adalah agen sbobet88 akan bersikap fair dan transparan terhadap membernya. Mereka semua tidak akan memaksakan kepada para calon member dalam memakai produk yang tidak dibutuhkan. Selain itu, mereka juga tidak akan menjelekan agen asuransi yang lain. Jika kalian ingin bermain judi online segera lah bergabung pada Situs Resmi Agen Sbobet88 Dan Login Sbobet Mobile Terbaik , situs ini sudah banyak sekali dimainkan oleh orang orang .
1xbet firmasına ulaşmak için giriş yapın. 1xbet sitesinin en güncel giriş adresi! 1xbet giriş adresini bulmak 1xbetm.info ile çok kolay!
marsbahism en iyi bahis siteleri en iyi casino siteleri gaming siteleridir. Poker siteleri ve casino slot adresleri için tıklayınız. https://www.marsbahism.com/
Thanks bro this blog very good
This website very niche, full article i like . Thanks
Specially thanks to you bro, your blog very Good.
Very niche thanks bro
I will back later ya bro
Thanks niche web
I want to voice my appreciation for your kind-heartedness in support of people that have the need for help with that situation. Your real commitment to passing the solution all through appears to be definitely useful and have in every case encouraged folks much like me to realize their objectives. The interesting advice signifies so much a person like me and substantially more to my fellow workers. With thanks; from everyone of us.
I have to show my respect for your generosity supporting folks that really want help on this particular situation. Your very own dedication to passing the solution all over ended up being certainly useful and have usually enabled most people just like me to reach their objectives. This warm and helpful hints and tips indicates much to me and still more to my fellow workers. Regards; from each one of us.
Excellent post, very informative. I wonder why
other specialists of this sector don’t realize this.
You must continue your writing. I am just confident, you possess a fantastic readers’ base already!
Wow, What a Excellent post. I really found this to much informatics. It is what i was searching for.I would like to suggest you that please keep sharing such type of info.Thanks . I am continually hunting on the web down articles that can help me. There is clearly a great deal to think about this. I think you made some great focuses in Features too. Continue working, extraordinary job . Great tips and very easy to understand. This will definitely be very useful for me when I get a chance to start my blog. Good writing and good photos. We wish you a happy and healthy New Year 2021. I would like a lot of good posts in the future. I will subscribe. If you have time. 먹튀검증업체
That is the incredible mentality, in any case is simply not assist with making each sence at all proclaiming about that mather. Basically any strategy an abundance of thanks notwithstanding I had attempt to advance your own article in to delicius all things considered it’s anything but a predicament utilizing your data destinations would you be able to please reverify the thought. much appreciated again 토토커뮤니티
I have been searching to find a comfort or effective procedure to complete this process and I think this is the most suitable way to do it effectively. I am really enjoying reading your well written articles. It looks like you spend a lot of effort and time on your blog. I have bookmarked it and I am looking forward to reading new articles. Keep up the good work. Thanks for posting this info. I just want to let you know that I just check out your site and I find it very interesting and informative. I can’t wait to read lots of your posts. It should be noted that whilst ordering papers for sale at paper writing service, you can get unkind attitude. In case you feel that the bureau is trying to cheat you, don’t buy term paper from it. 먹튀검증
I found this is an informative and interesting post so i think so it is very useful and knowledgeable. I would like to thank you for the efforts you have made in writing this article. If more people that write articles really concerned themselves with writing great content like you, more reader s would be interested in their writings. Thank you for caring about your content. You have a real talent for writing unique content. I like how you think and the way you express your views in this article. I am impressed by your writing style a lot. Thanks for making my experience more beautiful . I have recently started a blog, the info you provide on this site has helped me greatly. Thanks for all of your time & work. 토토핫
It is a good site post without fail. Not too many people would actually, the way you just did. I am impressed that there is so much information about this subject that has been uncovered and you’ve defeated yourself this time, with so much quality. Good Works! Thank you a bunch for sharing this with all of us you actually realize what you are talking about! Bookmarked. Please also seek advice from my site =). We could have a hyperlink change contract between us! You make so many great points here that I read your article a couple of times. Your views are in accordance with my own for the most part. This is great content for your readers. 토토사이트추천
A lower level of stress can be relieved with some activities. However, excessive stress can affect the daily life of the students along with their mental and physical health. If you are also a student and feeling stressed due to academic reasons then contact online assignment help services today. I definitely enjoying every little bit of it. It is a great website and nice share. I want to thank you. Good job! You guys do a great blog, and have some great contents. Keep up the good work. Wow, excellent post. I’d like to draft like this too – taking time and real hard work to make a great article. This post has encouraged me to write some posts that I am going to write soon. 더킹카지노
I like this kind of work.Thanks for sharing good information. 먹튀검증
Çim Tel ve Panel Çit
Tüm ağaçlar siparişe göre istediğiniz boy ve ebata göre hazırlanır ve tüm illere kargo ile gönderilir.
Şu an İzmir’de bulunan firmamızla tüm Türkiye’ye hizmet vermekteyiz. Kamu kuruluşlarına, özel kurumlara ve bireysel müşterimize birçok hizmette bulunduk, projeler ve referanslar sayfasından bu çalışmaların bazılarını inceleyebilirsiniz.
magnificent put up, very informative. I’m wondering why the opposite experts of this sector don’t notice this. You mustcontinue your writing. I am confident, you have a huge readers’ base already!
Good click article! Very thankful Cheers!
Nice article! keep writing this kind blog. Keep it up, thanks!!
I have read several excellent stuff here. Keep on writing
peyzaj bakım ve onarım, süs havuzları ve doğal taşlar
I’ve seen some very helpful stuff. I found a lot of information, but your article was the most attractive and excellent. I will visit you often.
Really appreciate you sharing this blog.Much thanks again. Want more.
That’s why it’s very hard to find, but I’m very fortunate to read your writing.
you get information related to earning money to blogging and digital marketing, business idea etc. in Hindi Fire Hindi
google
I’m very in love with you.
nice info bro, i falling in love with u.
Secara profesional, situs slot ini memang telah bekerja sama dengan ratusan perusahaan slot ternama demi memberikan pilihan gambling yang aman dan nyaman. Tidak perlu ada yang harus dikhawatirkan untuk mendaftarkan diri di agen ini. Karena, agen kami selalu terbuka untk seluruh member lama, member baru, maupun calon member.
job father big
April 7 (Reuters) – Short-seller Hindenburg Research said on Tuesday it had taken a short position on Ebang International Holdings Inc, sending the Chinese bitcoin mining
machine producer’s shares down more than 12%. “Ebang claims to be a ‘leading bitcoin mining machine producer’, yet our research indicates this extraordinary claim is backed by no evidence,” the short-seller said website “Ebang released its final miner in May 2019 and has since seen its sales dwindle to near-zero, delivering only 6,000 total miners in 1H20.” Short sellers
sell borrowed shares in the hope of buying them back at a cheaper price and
pocketing the difference. In a statement on Wednesday,
Ebang said the Hindenburg report contained many errors, unsupported speculations and inaccurate interpretations of events. It added it intends to
further review and examine the allegations and take necessary action to protect the interest of its
shareholders. The recent bitcoin mania has fueled a surge in fundraising by Chinese companies seeking to expand
their cryptocurrency operations or move into the red-hot sector. Ebang debuted on Nasdaq in June last year and had conducted
two fundraising rounds in February alone, raking in $170 million, even after a previous offering in November. Hindenburg,
which went short on another Chinese blockchain company Sos Ltd in February,
said its research revealed that instead of using
capital proceeds to develop its business, Ebang directed much of the cash out of the company through “a series of opaque deals with insiders and questionable counterparties.” Hindenburg had also taken short positions in electric vehicle companies including Lordstown Motors,
Nikola Corp and Kandi Technologies Group Inc.
(Reporting by Chavi Mehta and Akanksha Rana in Bengaluru; additional reporting by Akriti Sharma; Editing by Rashmi Aich and Subhranshu Sahu)
adverts.addToArray({“pos”:”inread_player”})Advertisement
HOKI222 is a trusted online gambling site in Indonesia, we are also a trusted online casino bookie that provides game such as soccer gambling, online slots, agile, poker, lottery, cockfighting, shooting fish and many other exciting game. We have been established for a long time and are trusted by bettor kegandrungan throughout Indonesia, our site has been established for decades to provide the best wins and offers for beginners World Health Organization can register themselves immediately. But you have to know, that the offer is not just any fake promotion. You can get many and abundant profits. Especially when you pemukul bola tenis meja on a regular bawah.
anda bisa menemukan banyak sekali hal menarik yang berkaitan dengan SBOBET88
This is the info I was looking for. I saw a very good article.은꼴 I will visit you often in the future. Thanks for the good article.
RTP Slot online terlengkap http://joannabriggs.org/rtp-live/
mainkan sbobet online terbaik di link berikut ini https://situsbobetindonesia.edublogs.org/
Thank you so much for ding the impressive job here, everyone will surely like your post.
Your creation are gorgeous and I am definitely going to be copying that one! Nice post
Thanks its a great and nice post keep sharing that kind of ideas.
thanks for infomation
İzmir Çeşme bölgesinde hafriyat hizmetleriniz veriyoruz.
Parfume bela rome murah dengan aroma tahan lama, cocok untuk aktivitas harian tanpa khawatir boros di kantong.
Spot on! Thanks for providing such a clear perspective. Buy corporate gifts in gwalior