Good morning friends, it’s Alicia from A Burst of Beautiful visiting with you again today!
Fall is in full swing around our house, the cooler temperatures and shorter days have inspired me to start decorating our home for the coming season. Although I will miss the lazy days of summer, I always enjoy the transition into the fall months, so full of warmth and comfort.

I tend to decorate our home in a very neutral color palette so that I am able to easily add different colors or patterns based on the season. One of the things I love most about the fall is the rich harvest colors. I find so much beauty and inspiration in the changing leaves, flowering mums and organically shaped gourds and pumpkins that are so prevalent this time of the year. I think it’s these deep colors that help add an extra layer of warmth to our homes during this season.

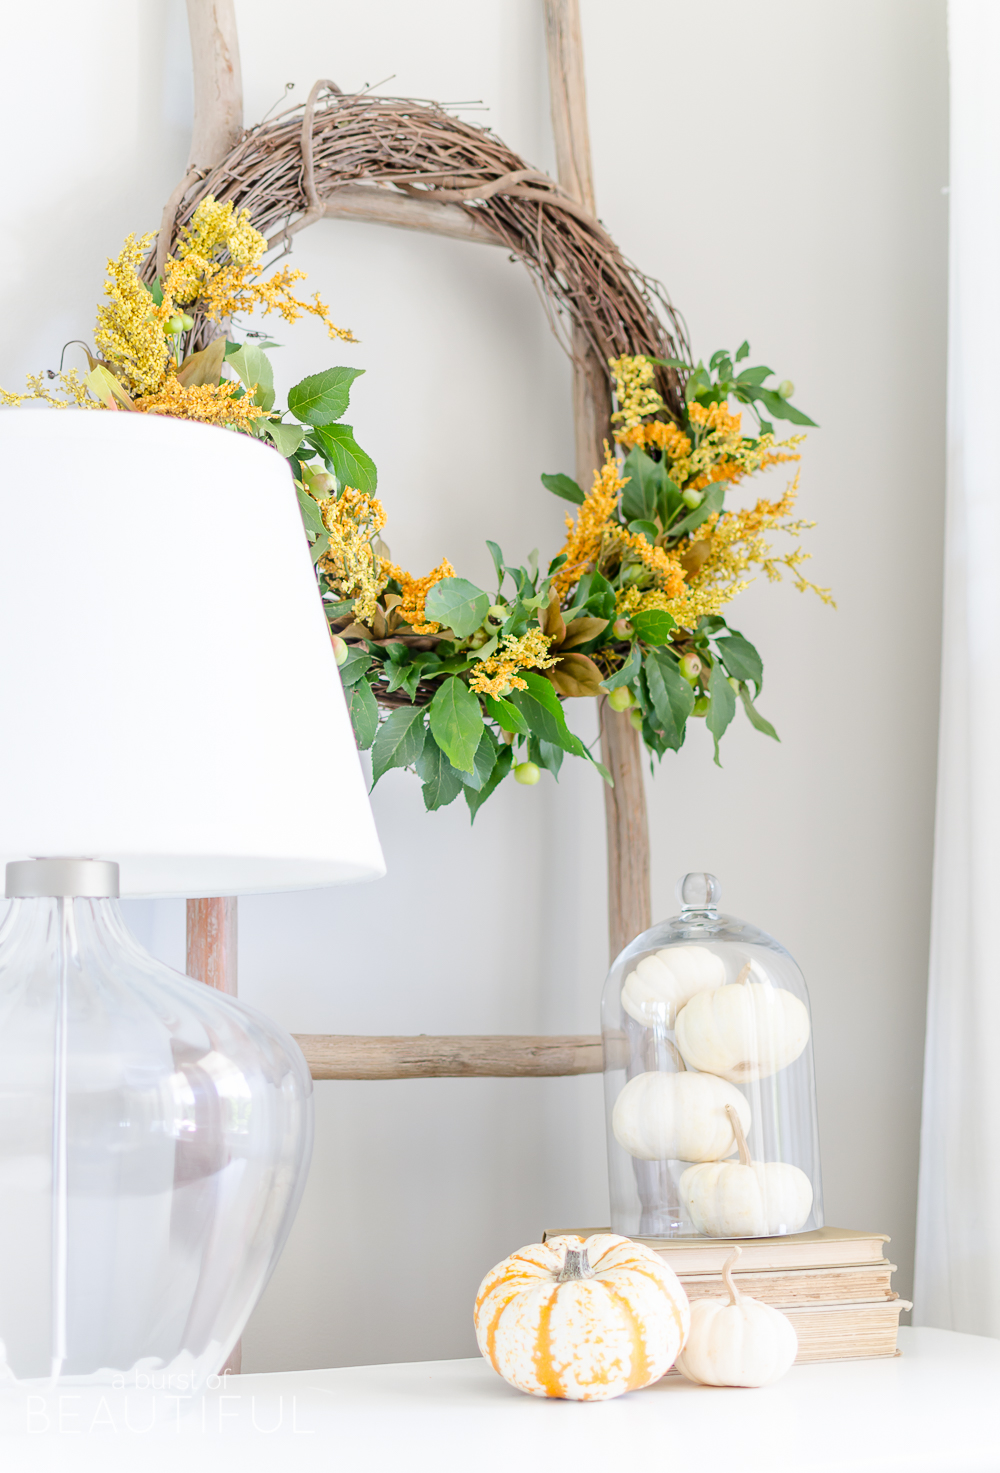
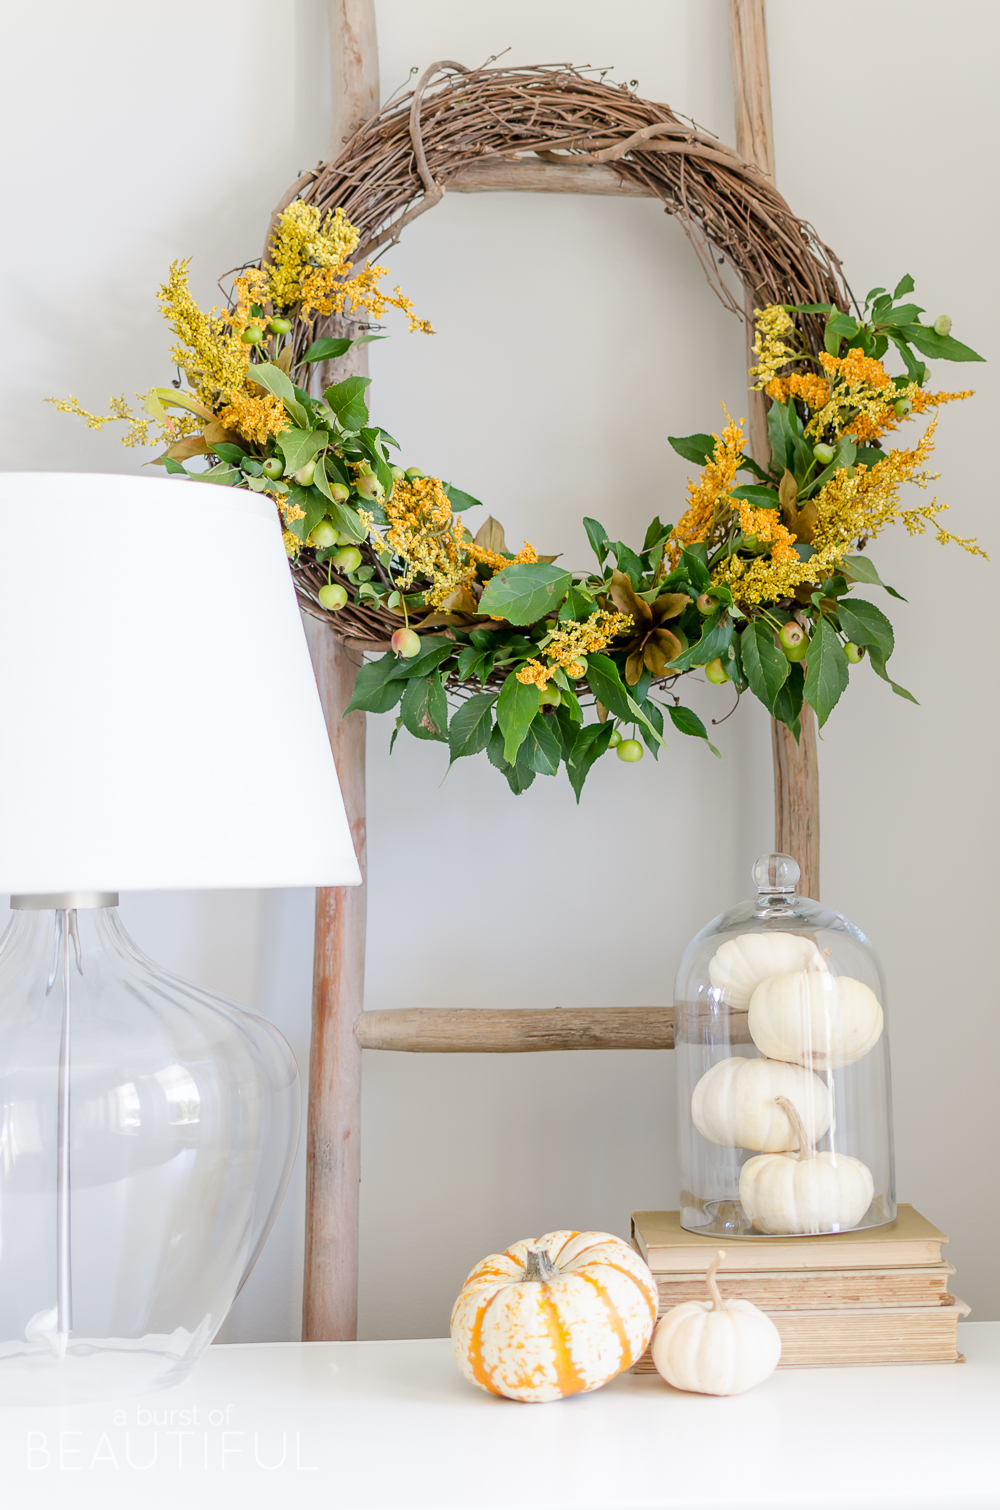
This year I am really drawn to the golden colors that are popping up in nature. You’ll find black-eyed Susans, sunflowers and goldenrod scattered throughout our living room, mudroom and kitchen for our fall home tour.
So today I want to share with you this very simple natural fall wreath I made from only three supplies – a grapevine wreath, faux goldenrod stems and fresh clippings from our yard.
It’s a quick and inexpensive way to add a little touch of fall to your home.
Supplies
- Grapevine wreath
- Faux goldenrod stems
- Fresh greenery
Instructions
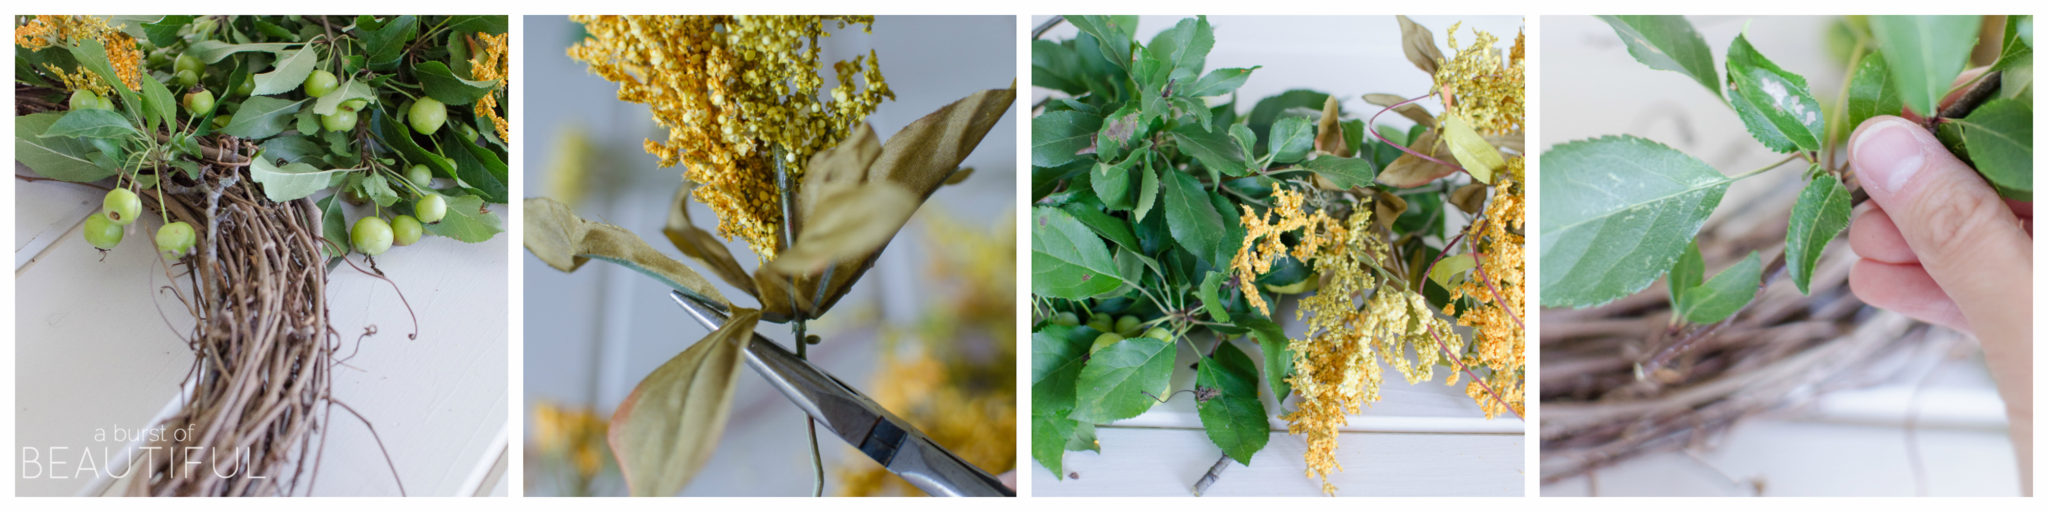
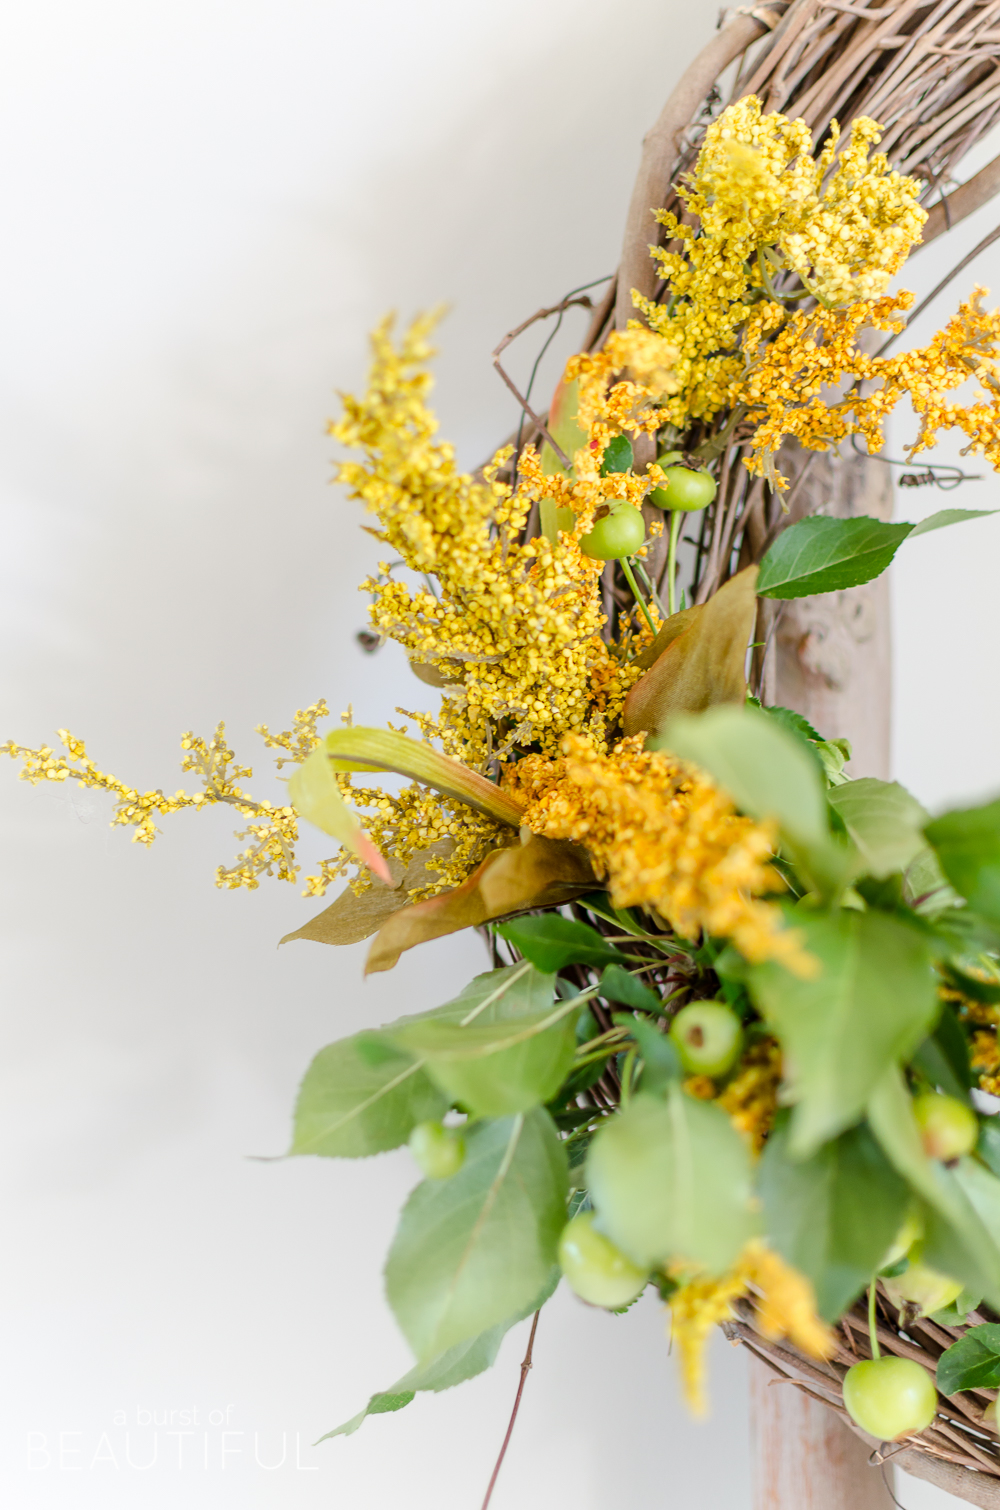
- Start by foraging around in your own backyard. I chose to clip small branches from our crab apple tree because I loved the tiny berries that were slowly beginning to turn orange. But you can choose any type of tree that you like, just be sure the branches are small enough to slip through the branches of the grapevine wreath.
- Next, using wire cutters cut apart the faux goldenrod stem so that it is in individual pieces. I also removed the green leaves from each piece as I didn’t like the color.
- Finally, slip the branches and faux floral stems through the grapevine wreath to create the look you want. I don’t like to use hot glue or floral wire to hold the pieces in place as I take my wreaths apart each year (you’ll have to do this as you’re using fresh greenery) so that I can use the wreaths again for the coming season.
That’s all there is to it, a simple and fun fall project! Have you begun embracing the fall season yet, or are you still savoring every last bit of summer before it ends?
If you enjoyed our post today, we would love to have you follow along…
Blog Instagram Facebook Google + Pinterest Twitter YouTube


This fall wreath tutorial is such a beautiful and cozy idea — I love how natural elements can completely transform a space for the season. It’s inspiring to see creativity like this paired with such clear instructions! While exploring seasonal projects, I recently came across some helpful details on Hamilton Court Records that offer useful local insights for those interested in community-related information. Thanks for sharing this lovely DIY — it’s definitely going on my autumn to-do list!
Your fall wreath turned out beautifully — I love how simple materials can create such a warm seasonal touch. The step-by-step breakdown really makes it feel doable even for beginners. I was reading through your ideas and, while browsing for more inspiration, I came across Vanderburgh court records which I had open in another tab. Thanks for sharing such a cozy project; it definitely put me in the mood for autumn crafting!
This DIY fall wreath looks absolutely stunning! I love how the colors really capture the season’s warmth. By the way, if anyone needs to check details for legal matters, I recently found a useful resource for Spokane court record that makes the process much simpler and more organized. Can’t wait to try making this wreath myself!
Love this Natural Fall Wreath DIY—such a cozy and earthy touch for the season. The mix of textures and colors feels so warm and inviting, perfect for autumn décor. It actually reminded me how inspiration can come from unexpected places, much like browsing through Lexington County Archives when you’re looking for something meaningful. Thanks for sharing such a simple yet beautiful idea that really celebrates fall vibes.