Today was the first time in over a year that I had the house all to myself. It felt a little quiet and lonely, but perfect for crafting and just catching up on house work. I also managed to put together a tutorial of a little project I did over the weekend.

me some beautiful silver and turquoise jewelry.
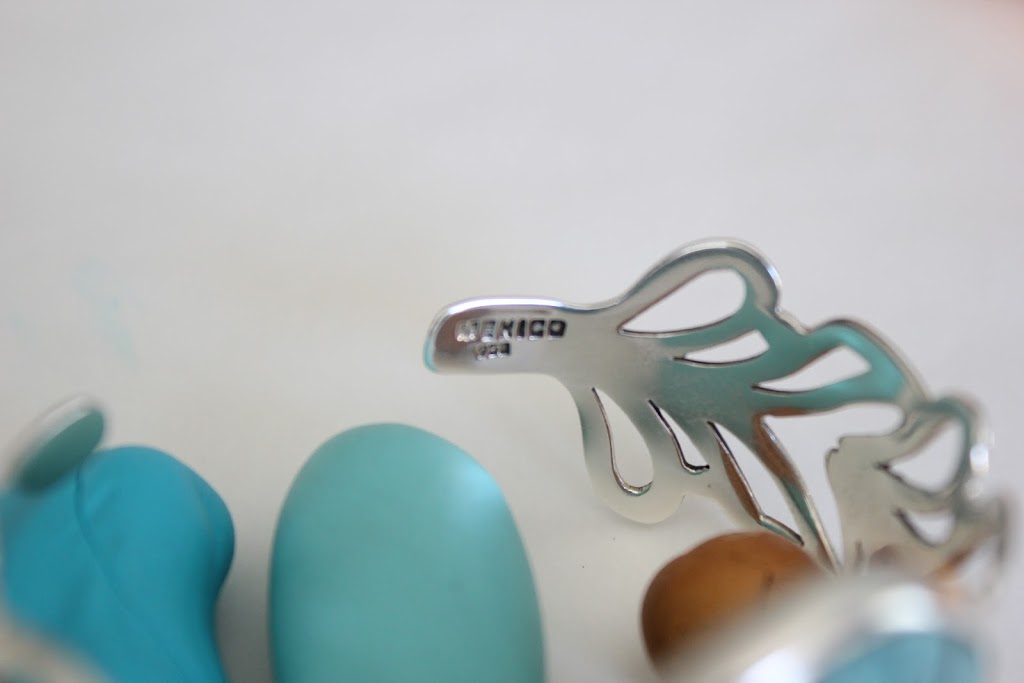
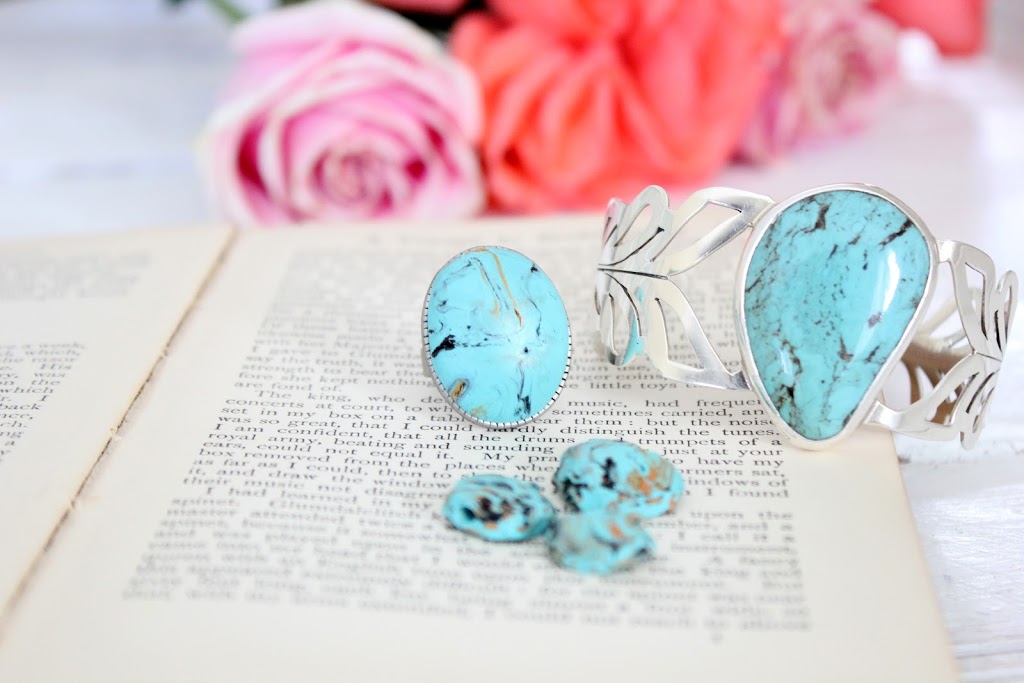
Mexico is well known for its turquoise and silver, but as usual, you have to be careful of impostor jewelry.
There are various ways to tell real turquoise from fake, but as technology advances so does the ability for manufacturers to make very realistic looking turquoise. If you are looking to purchase some turquoise, you can find some very useful tips here.
But if you’re okay with just the ‘look’, I hope you are going to love this very easy tutorial.

– Regular Turquoise: 2 parts turquoise + 1 part white +1 part ultra marine
– Pale Turquoise: 1 part turquoise + 1 part cobalt + 3 parts white
2. Knead together to make desired shade of turquoise; roll into a ball and place in the

The bracelet is the real thing and the ring is the brand new faux piece. Notice that I took photos prior to the clay being cured and therefore, it does not have a lot of sheen. Once it’s cooked you can polish polymer clay to give it a beautiful luster.


.jpg)

I love the way it turned out. Turquoise is such a versatile gem that goes with almost everything.
I hope you enjoyed this little tutorial. On the next post, I’ll show you some of the other polymer clay creations I made over the weekend.
See you soon.
much love,
Lucy
participating in the CSI challenge
Funky Junk Interiors
Carolyn’s homework
Home stories A to Z
Primp
The 36th avenue
Someday Crafts
French Country Cottage
2805
Crafty,Scrappy,Happy
Whipperberry
Tatertots and Jello
The girl creative
Chic on a Shoestring decorating
Finding fabulous
My Romantic Home
Simply designing
The Shabby Nest
I heart naptime
Today’s creative blog
It’s overflowing..
Ask Anna
a.k.a design
Thrifty Decor Chick
Cedar Hill Ranch

love it!
You are too much!!! Your pieces look so REAL! I love that you hd the house all to yourself and spent part of it crafting and creating a tutorial for us. Love ya to the moon and back…xo Diana
wow what a great tutorial thankyou xxxx
Lucy,
WOW gorgeous.Just beautiful.How sweet of you husband to treat you to such lovely pieces too.
Anne
Lovely
Thanks so much for sharing this. It is just beautiful and I am just starting to play with clay so I will have to give it a try. I pinned this on my “Totally Rockin’ Tutorial’s” Board.
have a great day
Caroline
Oh my gosh, this is amazing! Wow, I would have never guessed this isn’t the real deal. You’re brilliant! I’m definitely pinning this to make in the very near future.
Really pretty but not something I usually see on crafty blogs…I love it. Nice to see a fresh take on crafting.
polymer clay is one of my favorite mediums…
love all things turquoise.
🙂
AAAAAAAAAND you are a genius. LOL LOVE IT!
totally brilliant and beautiful ~ this is a must try!
Lucy this is fantastic! Again, you have blown me away with your creativity! I can’t believe how much your turquoise looks like the real thing! Beautiful!
Jo-Anna
what? that is incredible! love how the ring turned out! xoxo
Whoa. So gorgeous, friend. You amaze me.
Beautiful and it looks so real
LOVE it!! LOVE LOVE LOVE watching you make amazing things with clay. 🙂
Lucy, these pieces are beautiful. Hugs, Laura
Beautiful! You did an amazing job.
I have never worked with clay because I’ve never seen anything that looked worth the effort to me That is Untill now! I’ve been wanting a chunky tourquoise necklace but the price was too dear. I will be trying this ASAP
This was so clever Lucy! Super great idea!
xo Becca
What a great idea, can’t believe how much it looks like the real thing!
Wow! That’s AWESOME! I have to try this. Your blog is amazing! Hopefully someday mine can look as good as yours. :o)
You are stupendously amazing Lucy. This faux turquoise is lovely. Thanks for sharing your amazing talents with us. Can’t wait to see your next pieces!
What a great idea! Looks so real!
Oh my goodness, I love this, what a great idea! Thanks so much for sharing! I am stopping by fro the Funky Junk Interiors link party and glad I did! Think I’ll have to do some snooping around now! 🙂
You are just amazing at your craft! You can’t tell a bit of difference and it is very pretty!
Congrats on winning the CSI Project Accessories challenge! This is a wonderful project…thanks for sharing the “how to”s.
Awesome!! What a neat project! Thanks for linking up at Feathered Nest Friday!
I love this – simply lovely! I have never worked with polymer clay before, but this might be the inspiration to get me started.
This might might a silly question, but how do you polish the cured clay?
I hope you do try it..it’s fun once you get started ..and it’s not a silly question….you buff it with a cotton cloth,some people sand it with very fine sandpaper,usually wet sanding to avoid the dust and then polishing with a cotton rag or micron paper…
When it’s sanded and polish it can almost look glasslike….:)
Your jewellery it’s so beautiful, I like it vey much, I also bought one at cheap omega watches
, If you want one too. can visit this address, The backpacks are beautiful at there. I think you will be love it too.
wow! that is so cool!!!! I’m gonna have to try this! thanks! where do i get it? Awesome Tutorial!
You really have a good handcraft. The jewellery is so beautiful,love the long hoop earrings
I love turquoise jewelry but hate the price! This is such a fantastic idea and really opens up a multitude of possibilities for faux turquoise jewelry! I was wondering thought what you use as polish though?
Totally cool! I love this Lucy!
Oh I love this! What a great idea! I love that first necklace from Neiman with all the gold in the stones! I’d love to make something like that! Thank you so much for sharing this you talented creative lady you!! 😀
My partner and i ended up being really motivated to get this site. This is because this really is this informative publish.
best jewelry store
jewelry stores in california
good post guys and thanks for your article this is simply awesome. thanks for your info.
I love your tutorial and your kindness in sharing your method. Please forgive the dumb question, but how did you get the top rounded and smooth to look like a stone rather a lump of clay? Did you have a form or template. Thank you for your response. Regards, Tish
Hello ma’am,
I wanted to use your great idea to make an angel guardian for my mom’s urn as she recently died. If I made a mold of a stone angel, what would you recommend as a mold release so as to not mess up the creation? Thank you for your time in looking at my idea and hopefully helping. I have two angels watching her urn and wanted a blue turquoise as it was her favorite stone.
Hello! It’s a really nice tutorial! I will try it! Here is a faux agate tutorial that you may want to try: https://www.fimodiy.com/jewelry/faux-amber-polymer-clay-bracelet-diy-tutorial.html
Remarkable web site, Distinguished comments that I can tackle. I am shifting ahead and might apply to my current job as a pet sitter, which may be very fulfilling, however I must additional expand. All the Best
Lucy, you sprang the black and gold on us! ☺️ There was no warning it was coming, and no measurements. As someone just asked me to make him a turquoise pendant, I thought I’d look up a tutorial. You didn’t end up with areas with too much black and gold? I was thinking I’d use gold leaf and for the black, acrylic paint, that after grating and cutting the turquoise clay into lumps, I’d put on gloves and mix some thinned paint into the clay, let it dry, and then drop in some bits of the leaf before pressing it together. Your way sounds easier, but I worry that I’d end up with large areas of gold and black where I’d rather the gold and black look like “veins” instead (or what you call the “matrix,” I guess). I don’t see any of your results here so I don’t know whether my prediction came true. Or am I wrong and you posted some photos and I’m too dopey to spot ‘em? I’d love to see your results before I waste a buncha clay trying it my way! If they’re here, point me to ‘em, please?
Thanks ever so much!
is such a Hindi blog which was created by Rahul Kumar Singh ji. This blog has made a great contribution in the field of Hindi in the web world Coding kya hai
Wow, it’s amazing. I don’t think we should play around on this topic. We need to have an in-depth conversation about this. I want more people to read this. 메이저토토사이트
I’m going to share your blog with my friends. To be honest, I’ve talked to my friends a few times about your posting. I couldn’t wait to talk about your blog. I want you to keep posting new posts. 토토사이트
Thank you so much for sharing this wonderful information. Thank you very much. You always have humor in your posts. It’s so fun and easy to read. When can I request a review?! 메이저토토사이트
no how “The “We into which it http://om987.com
We’re very glad you appreciated the images! However you want to cite them is probably fine, if you change them you can say “adapted from” at the beginning. Good Luck!
https://www.charlestonstateuniversity.com/